Elementor has come to define what page builders can do for WordPress websites. It’s no wonder that 6.7% of all WordPress websites use Elementor to design pages and posts.
There is an important reason behind Elementor’s success – it took the idea of a drag and drop page editor and took it up several notches. The latest free version of the Elementor comes with enough bells and whistles to build the website of your dreams. All without having to know anything about code!
From bulleted lists to comments and testimonials, there’s an Elementor block for everything. Including videos.
It’s that final video block we’re going to discuss here.
In this post, we’ll show you how you can embed a video on your website using Elementor. More than that, we’ll show you how Presto Player takes your videos to the next level.
Note that our test site uses the free version of Elementor so anyone can give it a try.
Let’s start!
How To Add a Video Using Elementor
The idea behind Elementor is simple.
The design area is divided into a grid. You have all the available blocks in the right sidebar. All you have to do is to drag the required block and drop them where you want it.
To demonstrate the process of adding a video using Elementor, let’s start with a blank post.
Step 1: Enable Editing With Elementor
Elementor is often not the default editor of your website. However, that’s easy to fix.
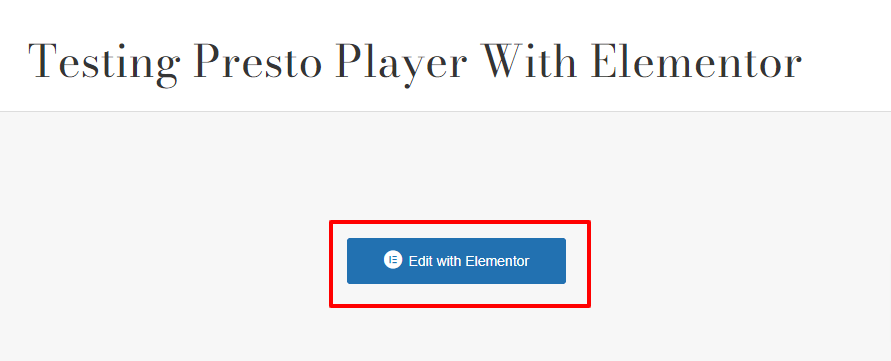
Open any page or post in WordPress and you’ll see the Edit with Elementor button at the top of the screen.
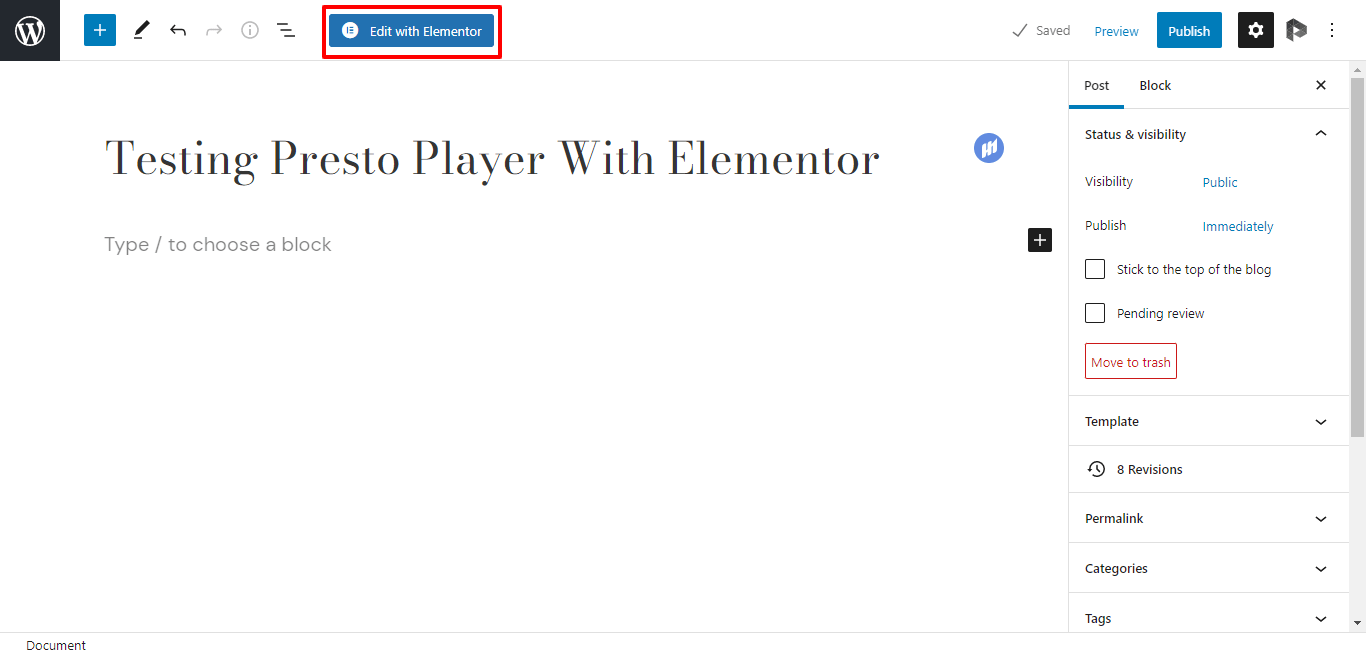
Click it to enter the Elementor edit screen.
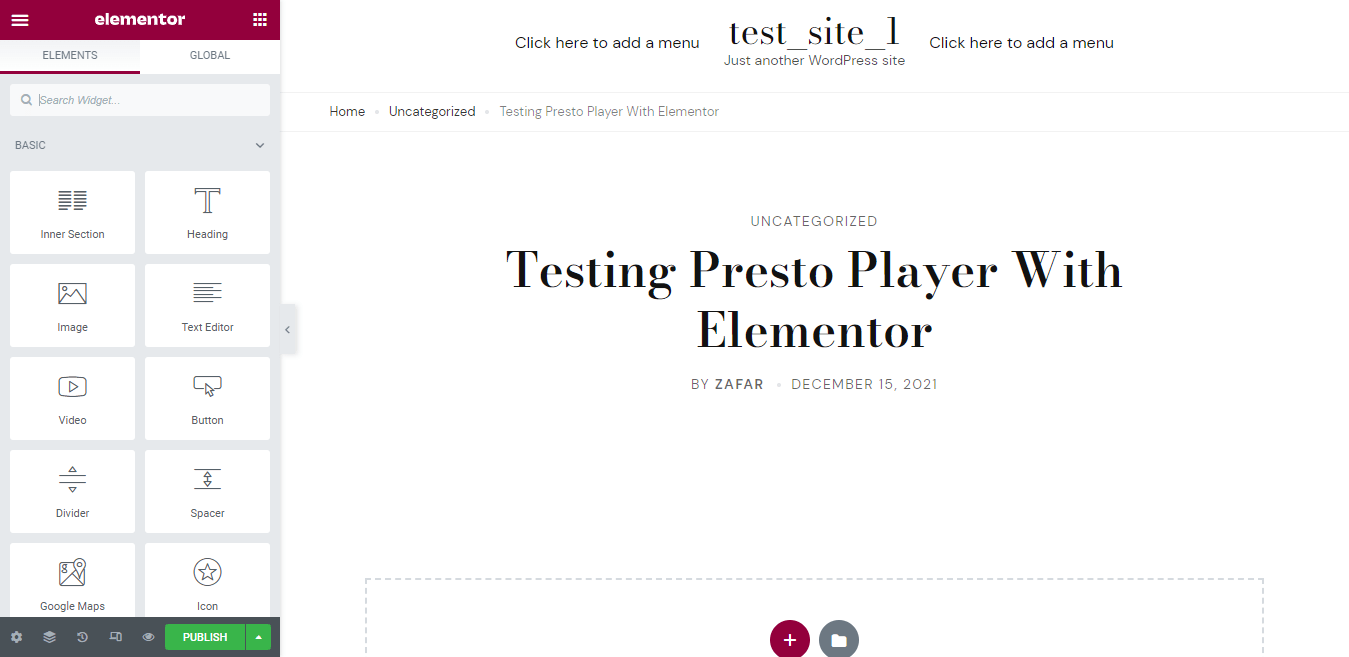
Step 2: Drag and Drop the Video Widget
In the right sidebar, you’ll notice the Video widget. In Elementor, this is the default way of embedding a video on a website.
When you drop the Video widget onto the page, a video placeholder is placed at the location.
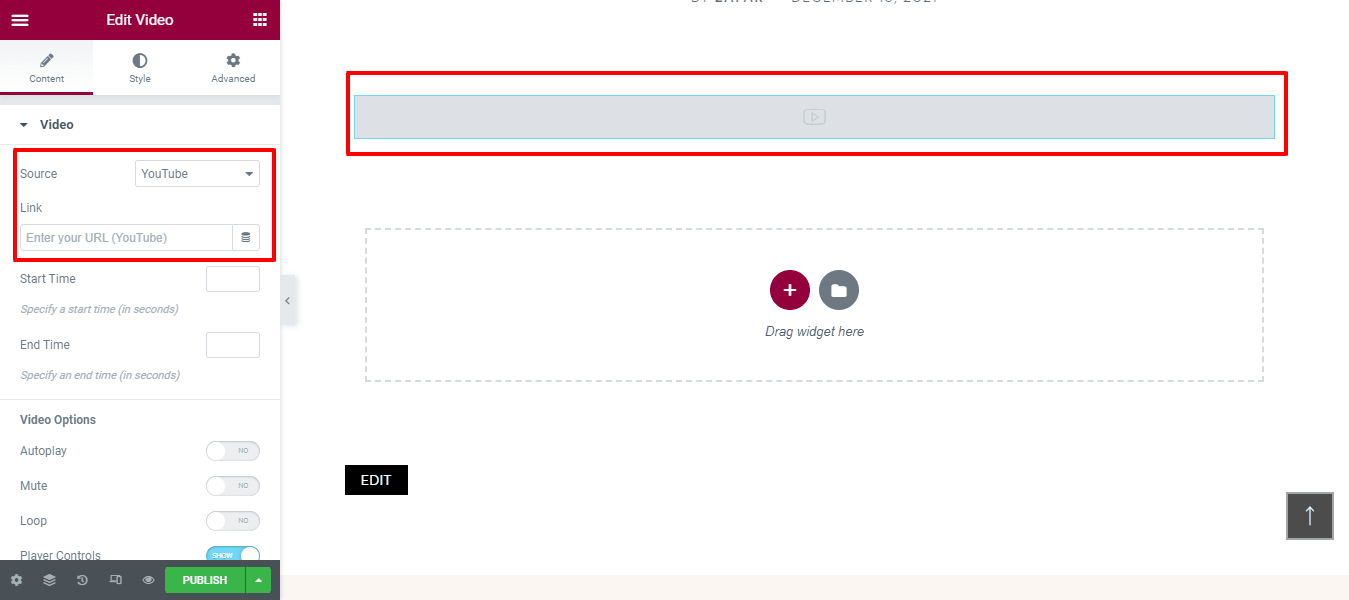
You can set the source of the video (the options include YouTube, Vimeo, Dailymotion, and Self-hosted). Next, you can supply the URL of the video.
You’ll notice that the options available in the sidebar change as you change the option in the Source dropdown menu.
If you scroll down the sidebar, you’ll see the Video Options panel.
Here, you can set various toggles to mute the video, loop it, show player controls, and enable lazy loading of the video.
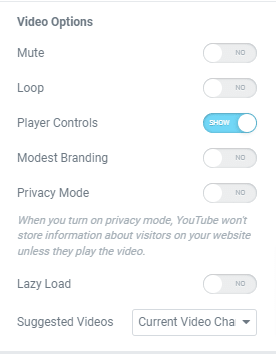
Using these options, you can fine-tune how the video would behave when a viewer comes to the page.
Step 3: Publish the Video
The final step of the process is clicking Publish. This essentially takes you out of the Elementor edit mode and publishes your post.
The process hardly takes more than a couple of minutes and you get to set the video you want by simply toggling the switches in the sidebar.
As you can see, the basic Elementor video block brings a lot of power to the table.

However, from a marketing perspective, this is a wasted opportunity, because the viewers just see the video and nothing else.
Presto Player To The Rescue!
Why Use Presto Player With Elementor Videos?
Video has become the most popular way marketers pitch their deals to potential customers. On the other side, video has become very popular because it seems that nobody has the time to read long articles. If you’re not sure your customers will be satisfied, you can implement it partly, do call center analytics, and get insights from it. This is the process of collecting and analyzing call center data, and it’s an excellent way to find out what your customers think.
In this context, it goes without saying that merely adding videos to the website doesn’t do the trick anymore. In essence, if your videos aren’t contributing to the marketing strategy’s goals, it doesn’t make sense to invest in the format.
Elementor is excellent for placing videos and offering a great experience to viewers. However, if you want videos to work for you, you need a solution that goes beyond Elementor.
Here’s where Presto Player adds value.
Presto Player offers a similar set of options as Elementor, such as easy video placement, mute play, and video loop.
However, this is where the functionality offered by Elementor ends. From this point onwards, you need Presto Player to make the most out of the video.
In the next section of this article, we’ll show you how you can add a video that has been enhanced using Presto Player features.
You’ll see how Presto Player takes your videos to the next level, where they actually contribute toward your marketing initiatives.
How to Add Presto Player Videos Using Elementor
The process has two steps. Essentially what happens is that the videos are first added to the Presto Player Media Hub. Next, you add these videos using Elementor.
Step 1: Add Videos to the Presto Player Media Hub
Start by going to the WordPress Admin menu, and in the left sidebar, click Presto Player > Media Hub.
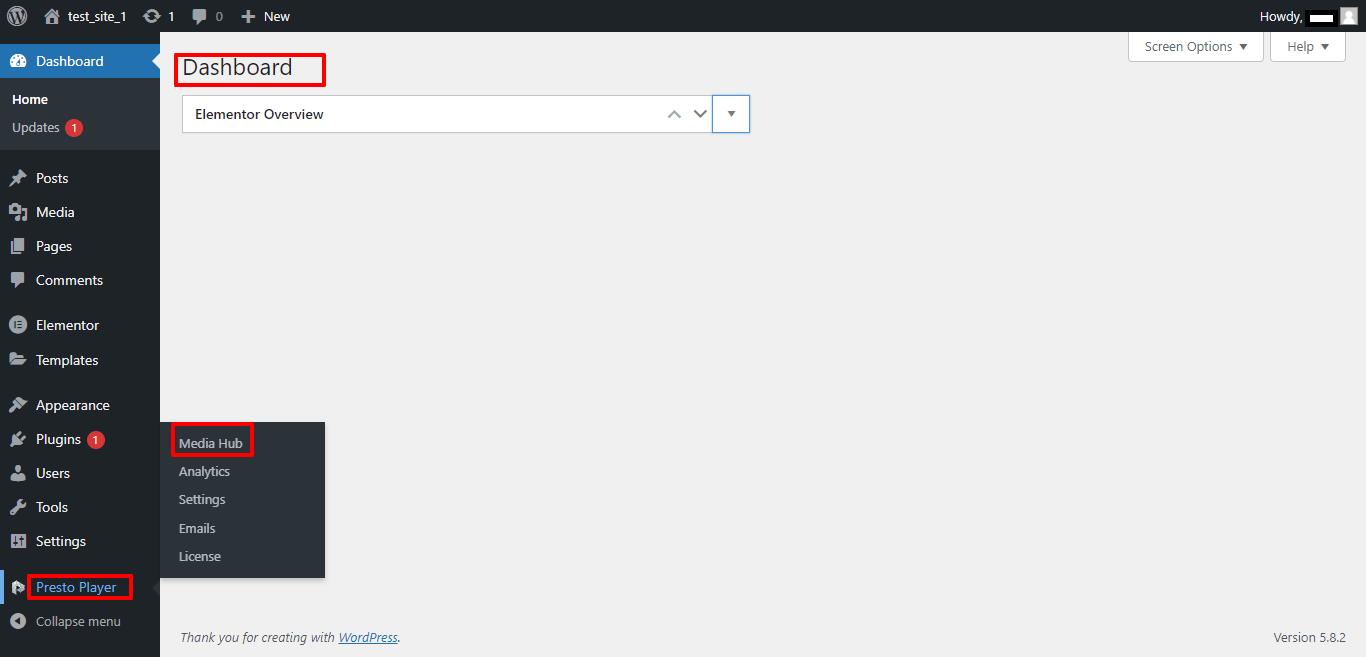
Click Add New to be taken to the add video screen. This is where you have your choice of the video source. While the last three options are self-explanatory, the first option Video may need a little explanation.
The Video option allows you to add self-hosted videos to the Media Hub.
If you want to know more about self-hosted videos, check out our article on self-hosted videos.
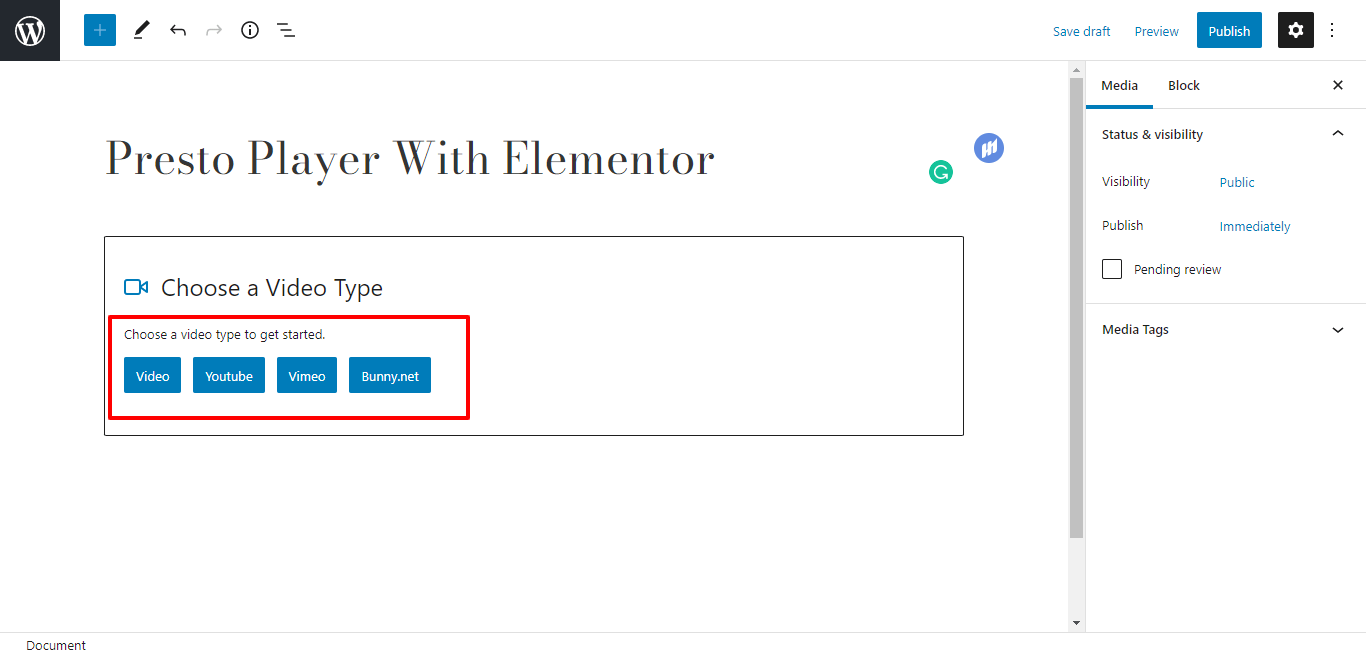
To demonstrate how Presto Player improves the role of video on your website, we’ll use a YouTube video.
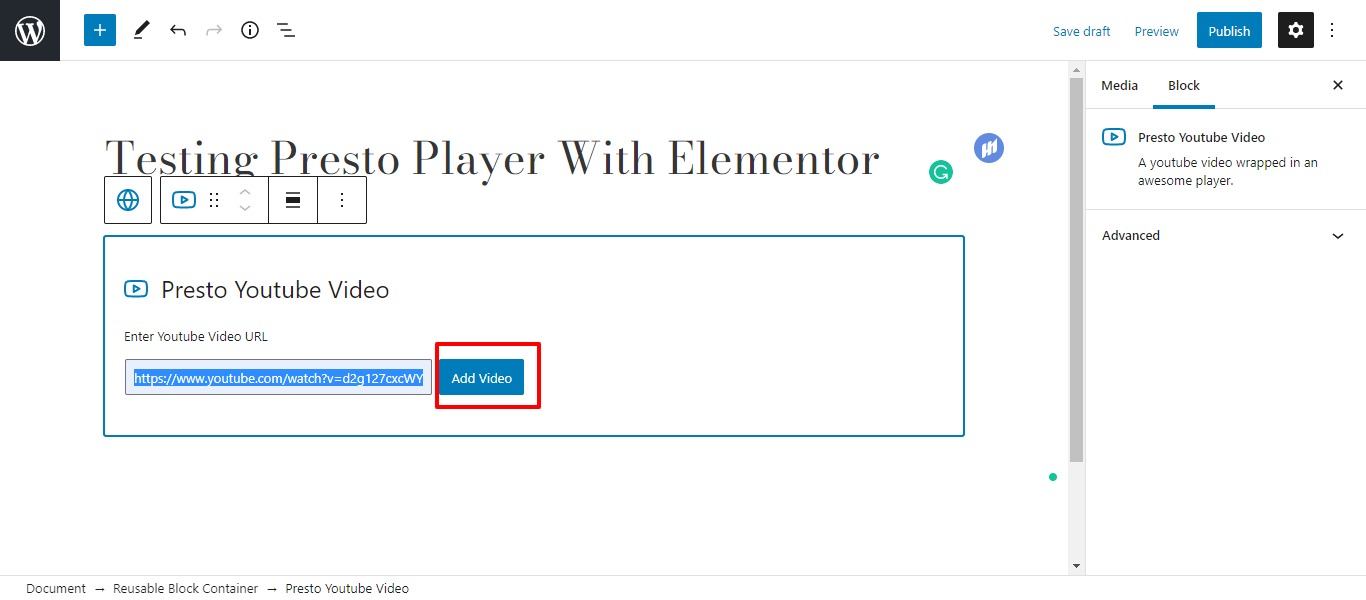
Click YouTube, and you’ll be taken to the Presto Player YouTube block.
Click Add Video to add the video.
You will see a preview of the video and a list of options available with the YouTube block.
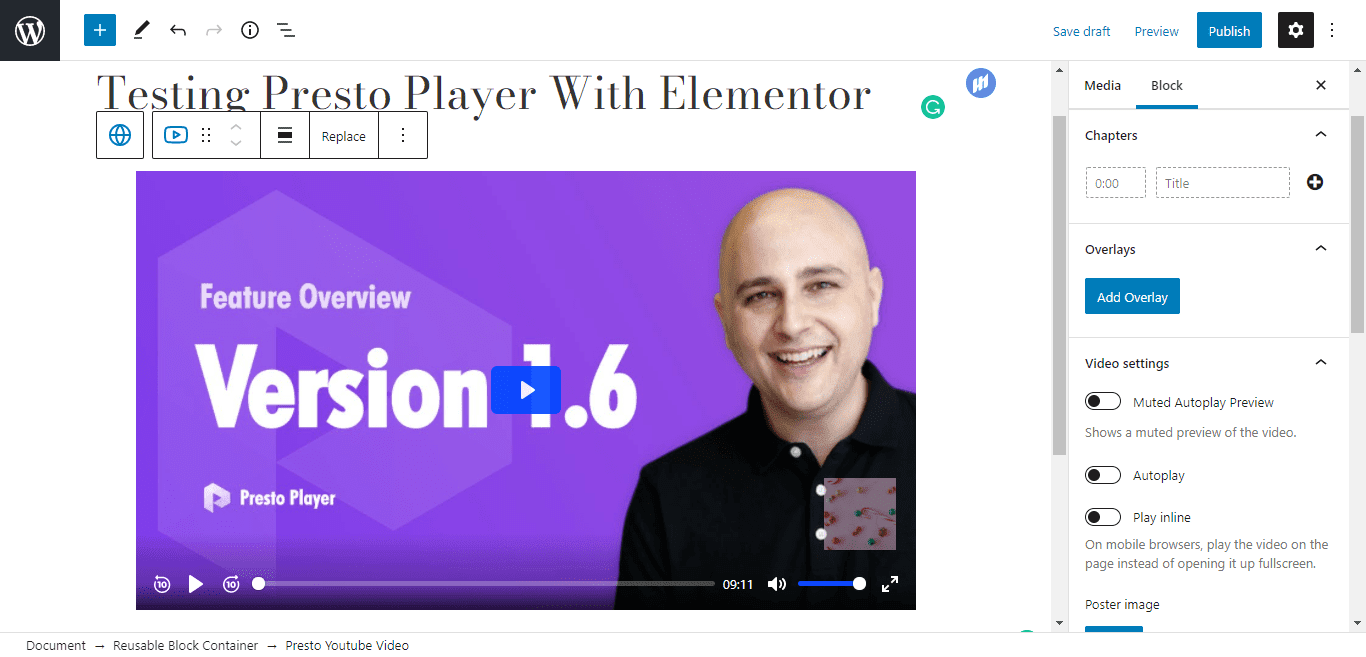
This is where you can take advantage of the following important features of Presto Player.
Chapter Markers
Like long-form articles, people usually don’t like long videos. On the other hand, longer videos tend to perform better on platforms such as YouTube.
Presto Player offers a nice middle ground with chapter markers.
You can select the starting and ending times of the important ideas discussed in the video. You can also add a short description that highlights the crux of the section.
With chapter markers, viewers can instantly go to the section of the video that interests them most. You can use as many chapter markers as you want in a video when you use Presto Player.
Video Overlays
Video overlays are information overlaid on the screen. Often, these overlays are used to display points that you didn’t include in the script. Another great use of video overlays is to correct any mistakes or outdated information in the video.
Presto Player allows you to add multiple overlays to a video. You just need to define the starting and ending times for the overlays and add the content you wish to appear during that window.
Video Presets
Video Presets is where you can experience the true power of Presto Player. With presets, you can set several options at once and really take advantage of video as a crucial piece of marketing machinery.
Presto Player video presets allow you to come up with a combination of email gates, action bars, and call to action buttons. In addition, you can also set how the player controls would appear to viewers.
Presto Player comes with five presets, including Course, Simple, Minimal, and YouTube Optimized.
Player Branding
Finally, you can add your logo design as a separate overlay on videos.
With the logo overlay, your logo appears at the corner of the video, and cannot be removed as it’s a part of the video itself. Now, even if someone manages to download the video, the logo overlay will continue to remind viewers who created it.
When you are done with optimizing your video, simply click Publish (or Update).
This will add the video to the Media Hub.

You can see that a video in the Media Hub also has a shortcode you can use to embed the video manually by simply pasting the shortcode where you wish the video to appear.
Step 2: Add the Video to the Page
The next step is to add the video that you just added to the Media Hub to a post using Elementor.
For this, go to Posts > All Posts.
Click Edit for your post and then click Edit with Elementor. You’ll now enter Elementor edit mode.
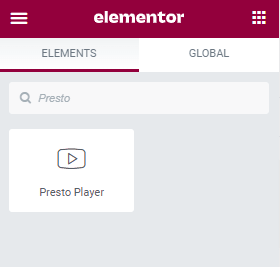
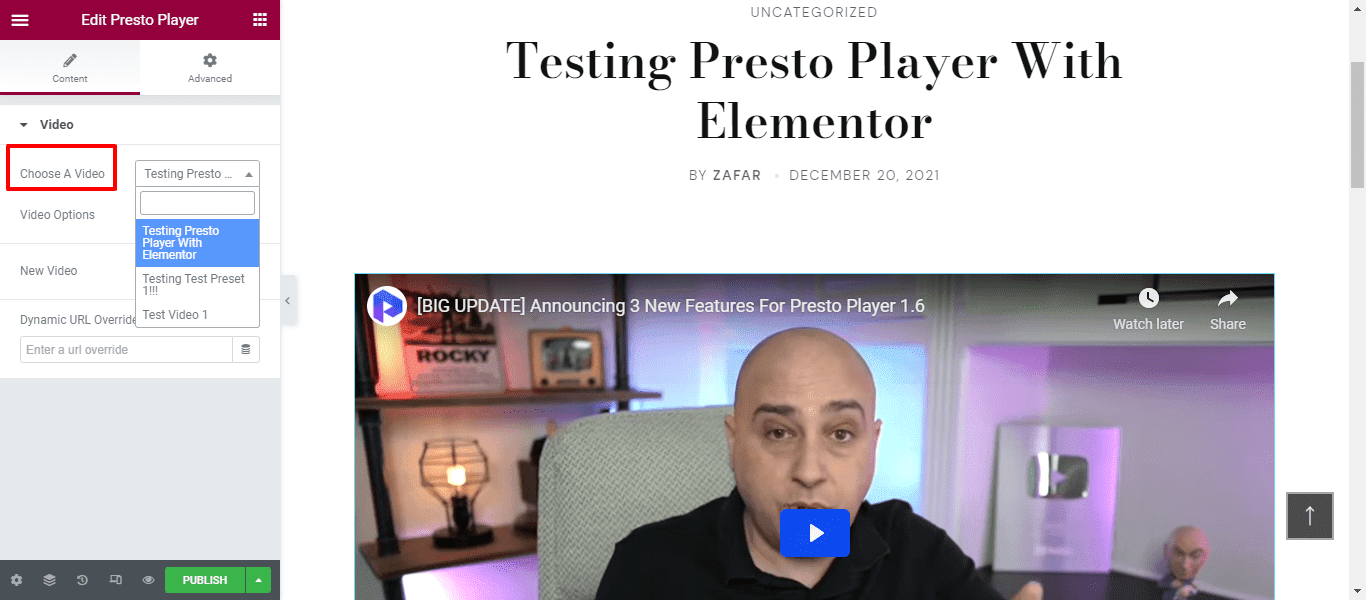
At the top of the right sidebar, you’ll find the search box. Type ‘presto’, and you’ll find the Presto Player widget.
Drag it to the post and you’ll see the options.
The first dropdown option, Choose A Video is where you can choose the video that you just added to the Media Hub.
Click it to add it to the post.
Under the second option, New Video allows you to go to the Media Hub and add a new video. Once you are done, you can come back to the Elementors Presto Player widget and select the video from the Choose A Video dropdown.
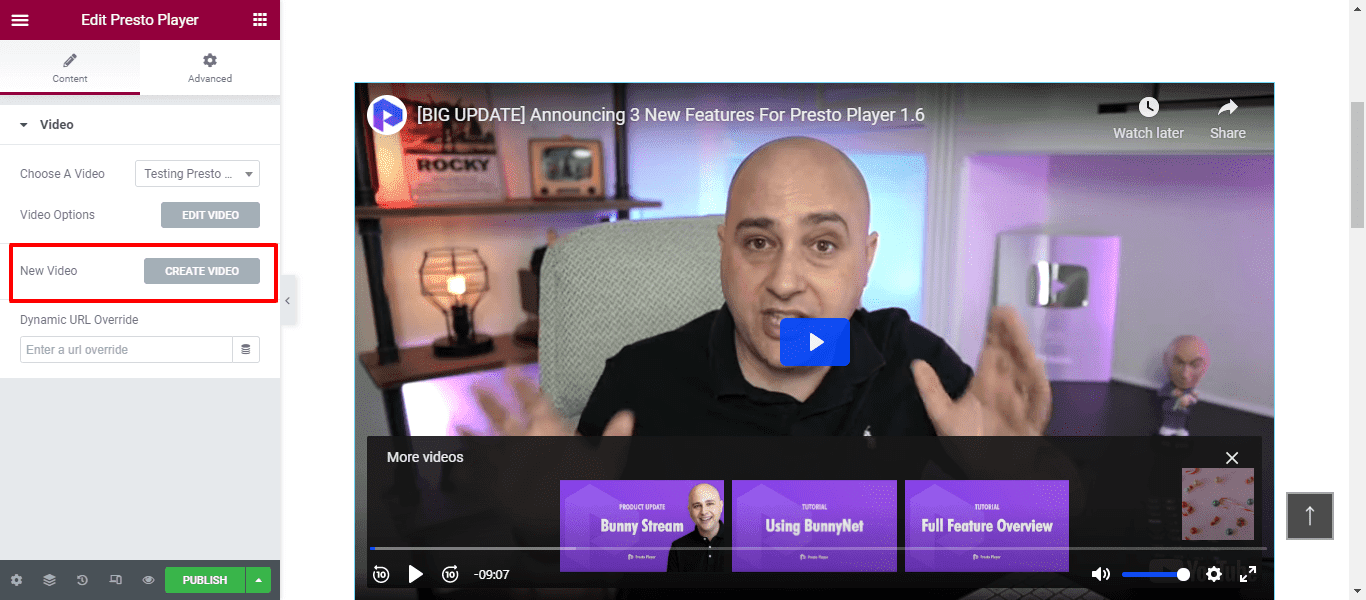
Finally, click the green Publish button to take the post live.
Conclusion
Elementor is a great option for editing WordPress websites because it simplifies the process and essentially allows anybody to create amazing website design.
With the Presto Player widget, you have the option to leverage the power of Presto Player for your Elementor designs.
Presto Player allows you to make the most of video by adding email gates and call to action buttons. The option to come up with a custom combination of 10+ options is a great way of optimizing the videos to fit your requirements.
As you can see, Presto Player supplies essential functionality that Elementor’s video widget doesn’t.
We hope that this post has successfully explained how Presto Player complements Elementor and adds functionality that goes beyond the scope of your favorite page builder.
