TutorLMS
Using Presto Player with TutorLMS is very simple. In this doc I will show you how.
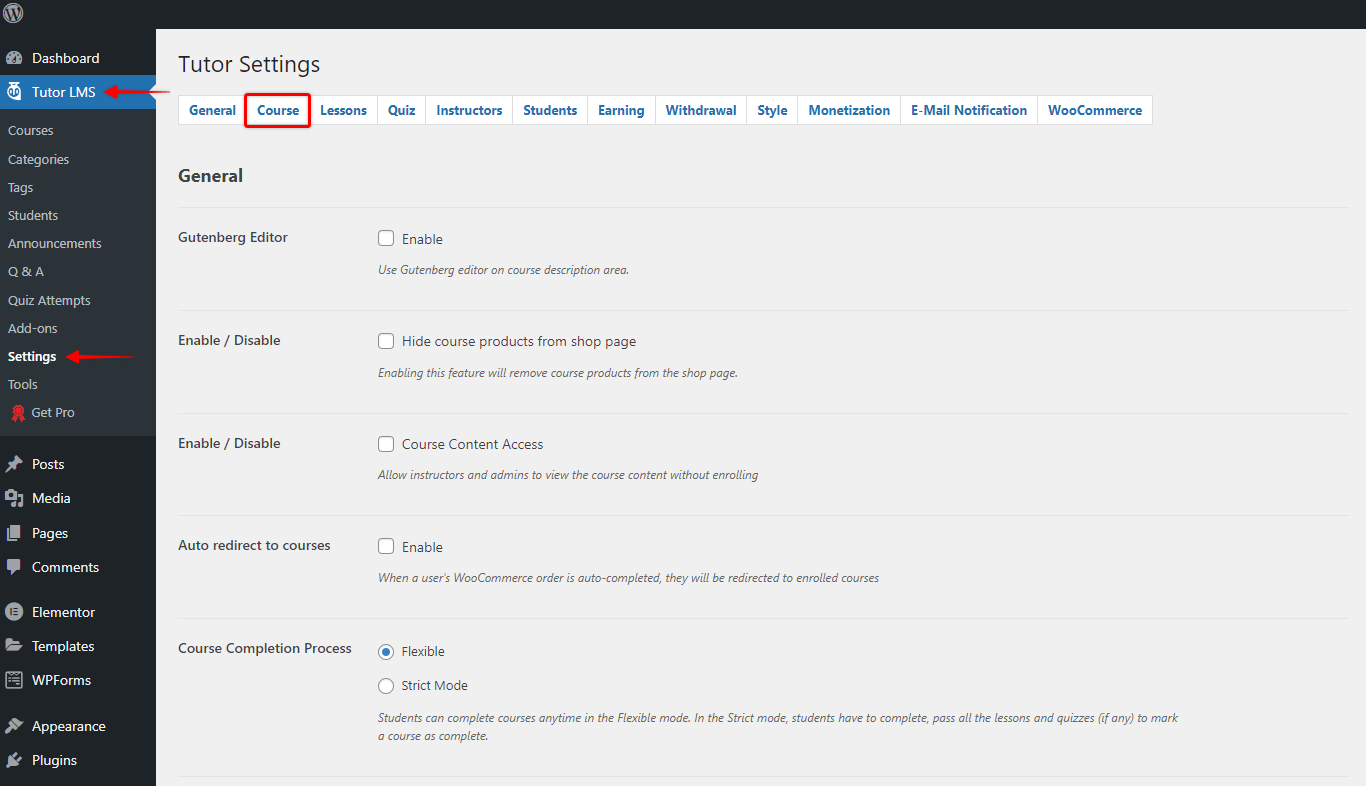
Step 1: Navigate to Dashboard > Tutor LMS > Settings and click on the “Course” tab;
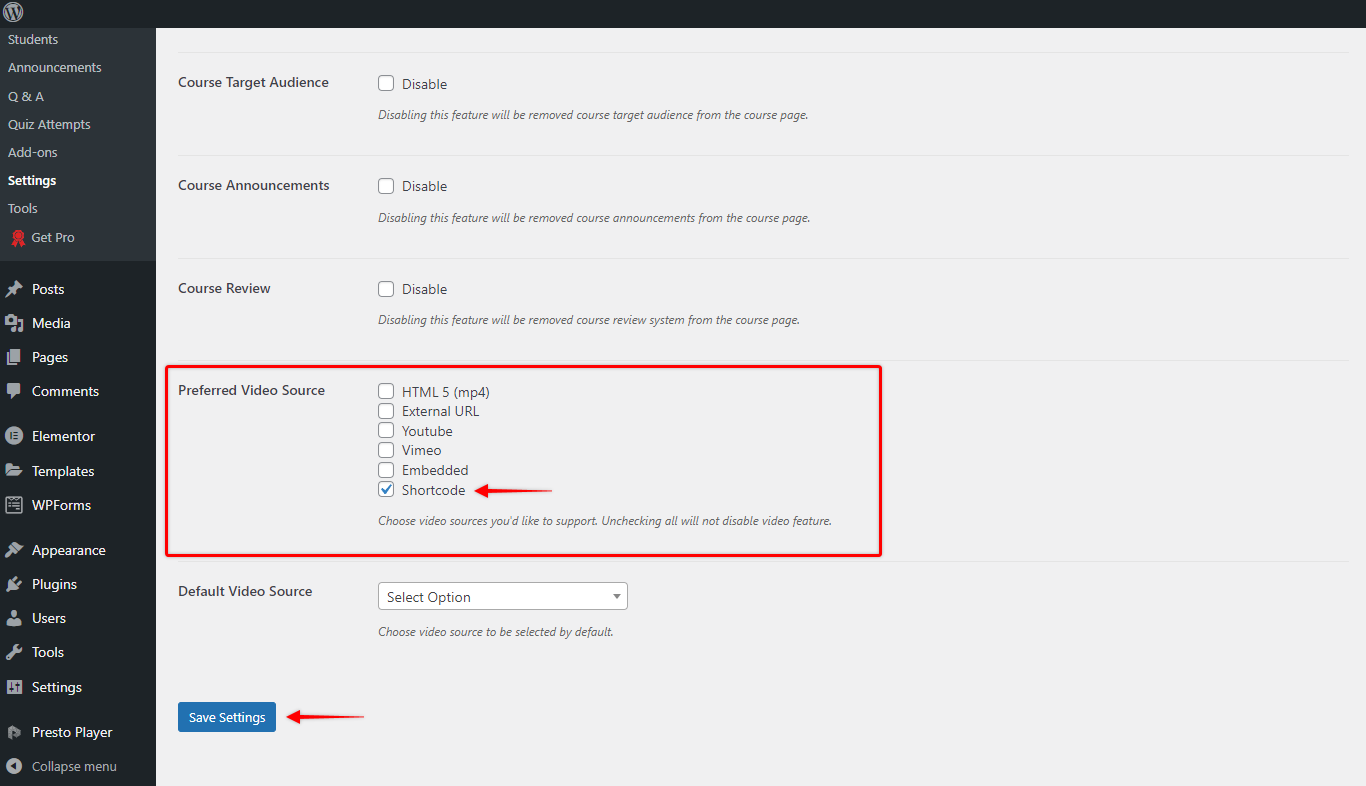
Step 2 – Scroll down to “Preferred Video Source” and check the “Shortcode” as the default video source in TutorLMS;
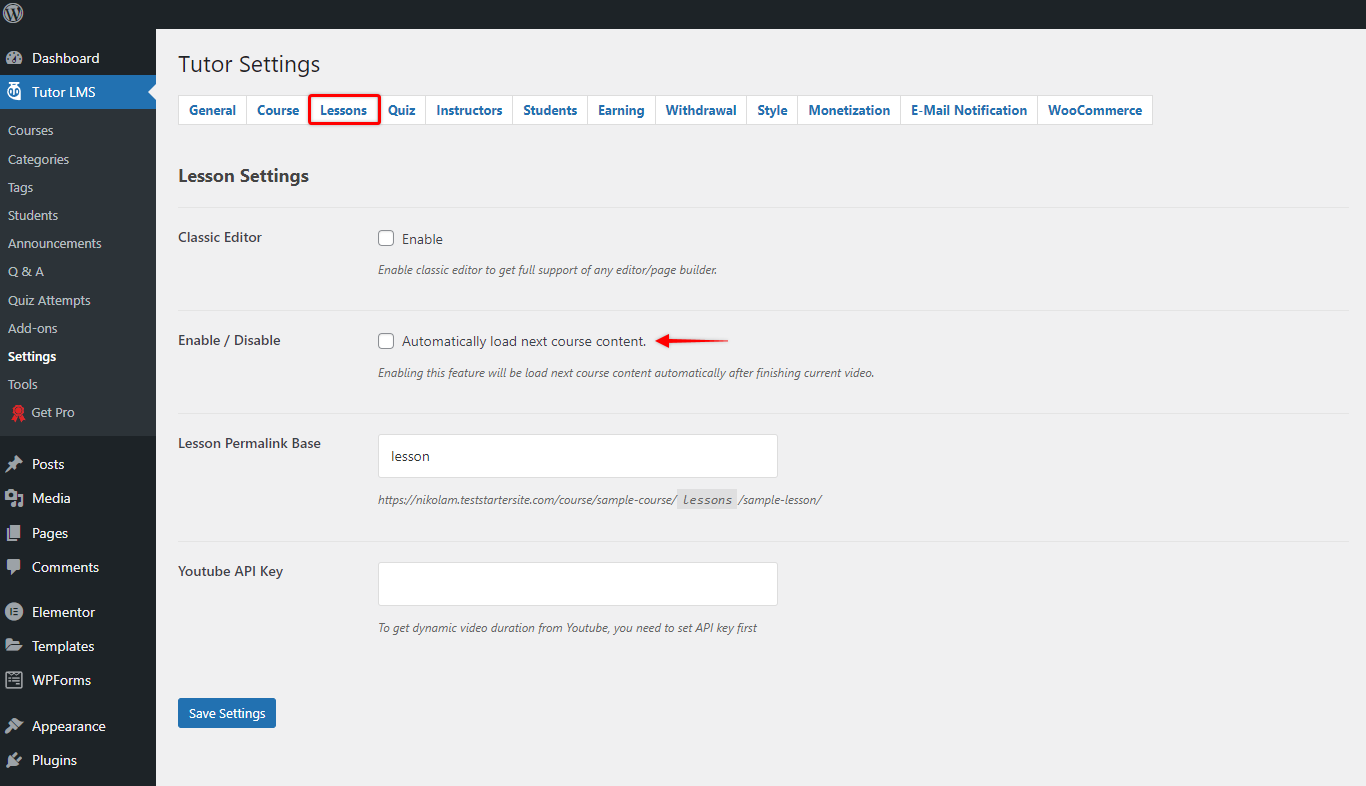
Step 3: Optionally, under the “Lessons” tab, enable video progression in the TutorLMS lesson settings;
How To Add a Presto Player Video To TutorLMS Courses
Make sure the “Shortcode” option is selected in your settings, and follow these steps to add your video:
Step 1: Add your videos to the Presto Player Media Hub. Once you add your video to Media Hub, you will get a shortcode that you can use for the course and lesson videos. Also, if you’re not sure how to do this, check more details in this article;
Step 2 – Copy the video shortcode in Media Hub. Then, navigate to your course at Dashboard > Tutor LMS > Courses;
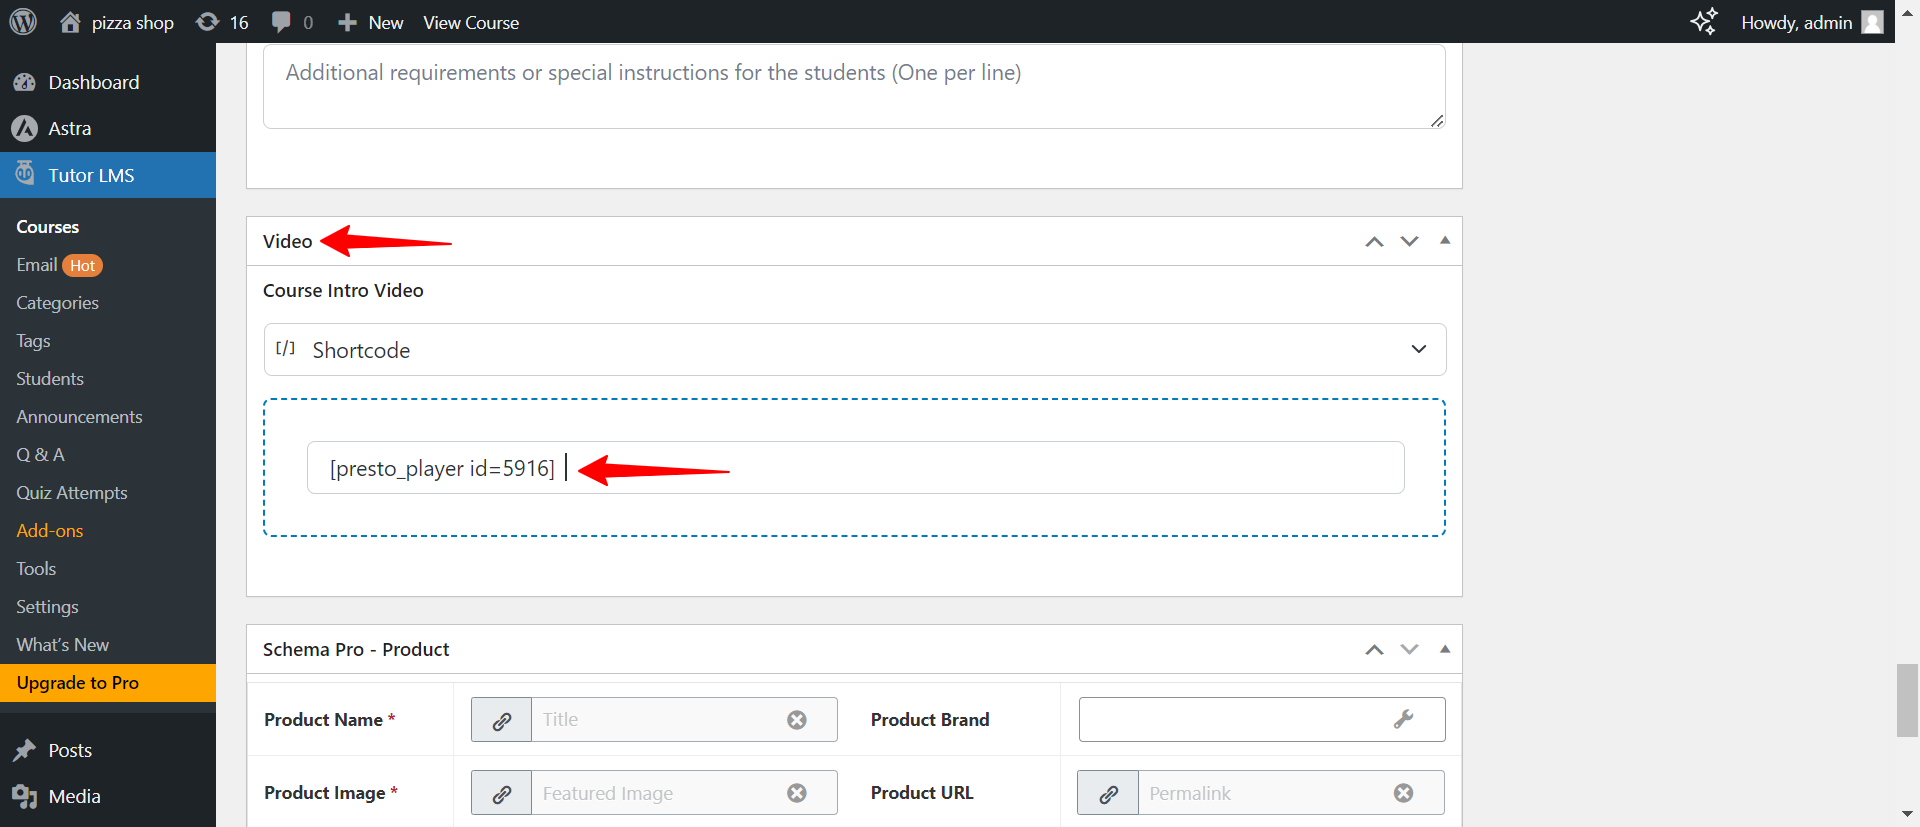
Step 3 – Click to edit your course. Now, scroll down to the “Video” section. Here, select the “Shortcode” in the dropdown, and add your video shortcode. Finally, click the “Update” button to save changes and add the video to your course.
How To Add a Presto Player Video To TutorLMS Lessons
Similarly to adding Presto Player video to your course, use the shortcode to add video to your lessons:
Step 1 – Copy the video shortcode in Media Hub. Then, navigate to your course at Dashboard > Tutor LMS > Courses;
Step 3 – Click to edit your course. Now, scroll down to the “Course Builder” section, click on the topic, and then on the lesson you want to edit. Now, the lesson popup will be displayed;
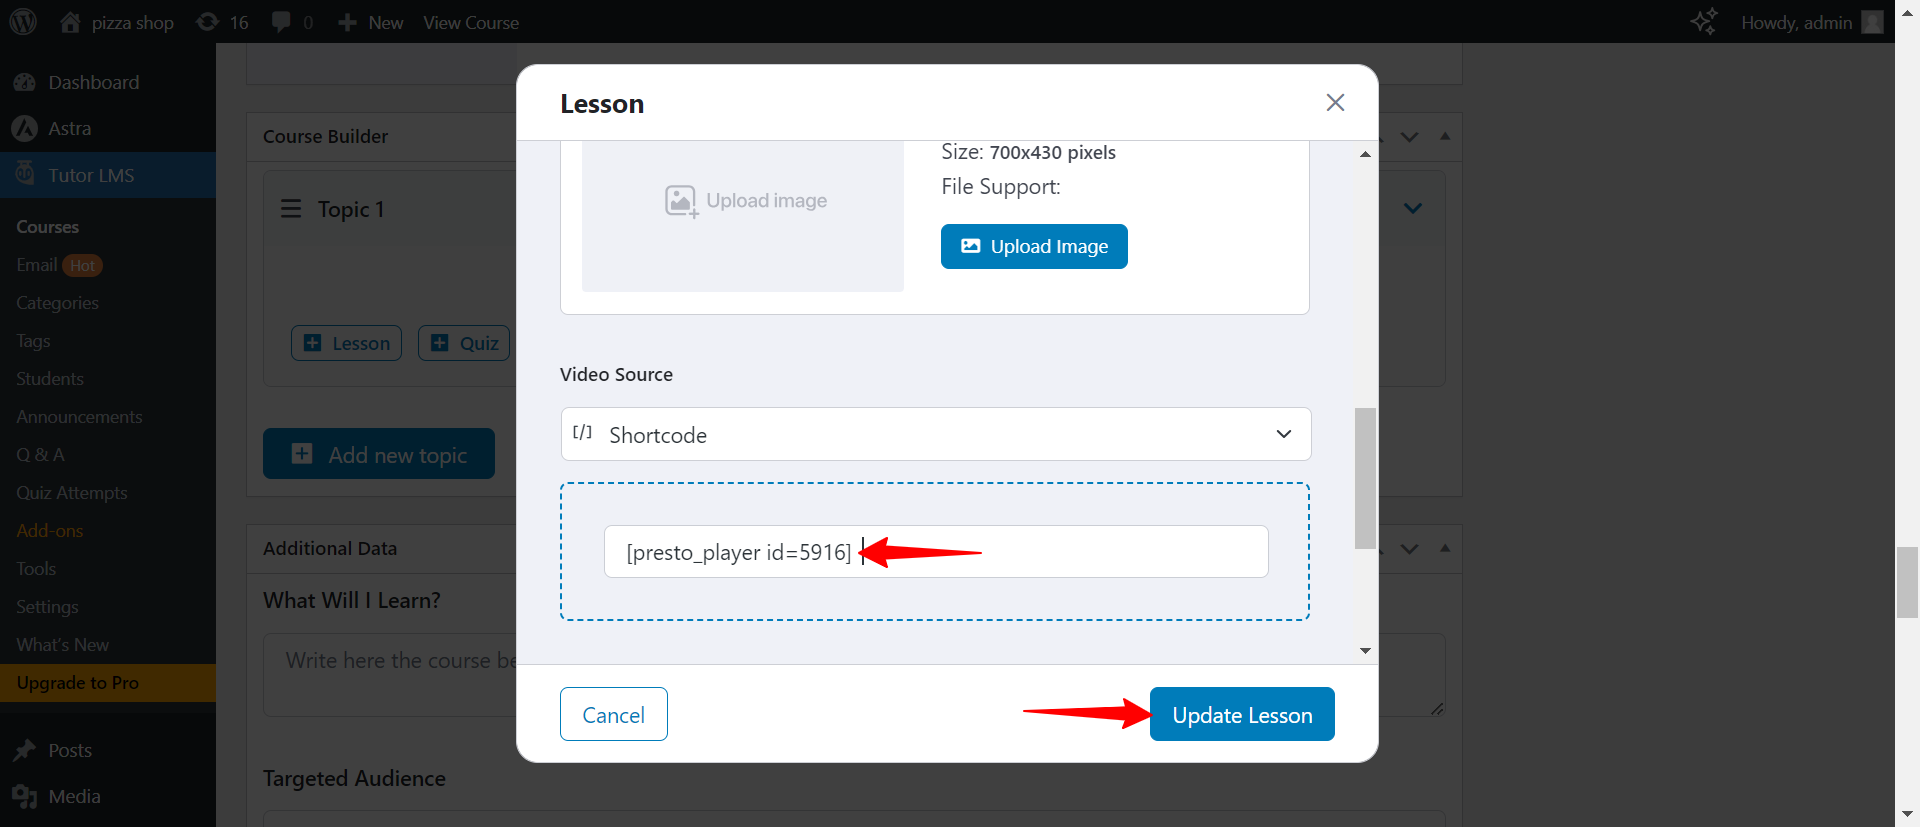
Step 4 – Here, scroll to “Video Source” section, and select the “Shortcode” in the dropdown menu. Below, add your video shortcode and the length of the video. Finally, click the “Update Lesson” button to save changes and add the video to your lesson.
We don't respond to the article feedback, we use it to improve our support content.