
- How to Get Started with Presto Capture
- Why Presto Capture Needs HTTPS
- Presto Capture Block Settings
- Presto Capture Shortcode Reference
- How to Choose Where Recordings Are Saved in Presto Capture
- How to Control Who Can Record in Presto Capture
- How to Brand the Recorder in Presto Capture
- Understanding the Presto Capture Admin Panel
- How to Manage Recordings in Presto Capture
- How to Activate Your Presto Capture Licence
Using Presto Player With Beaver Builder
Presto Player has a native Beaver Builder module, so adding video to your Beaver Builder pages is straightforward. This guide walks you through the full process, from adding your video to the Media Hub to embedding it on a page.
Add Your Video to the Media Hub
Step 1: In your WordPress dashboard, go to Presto Player > Media Hub and click Add New. Give your video a name.
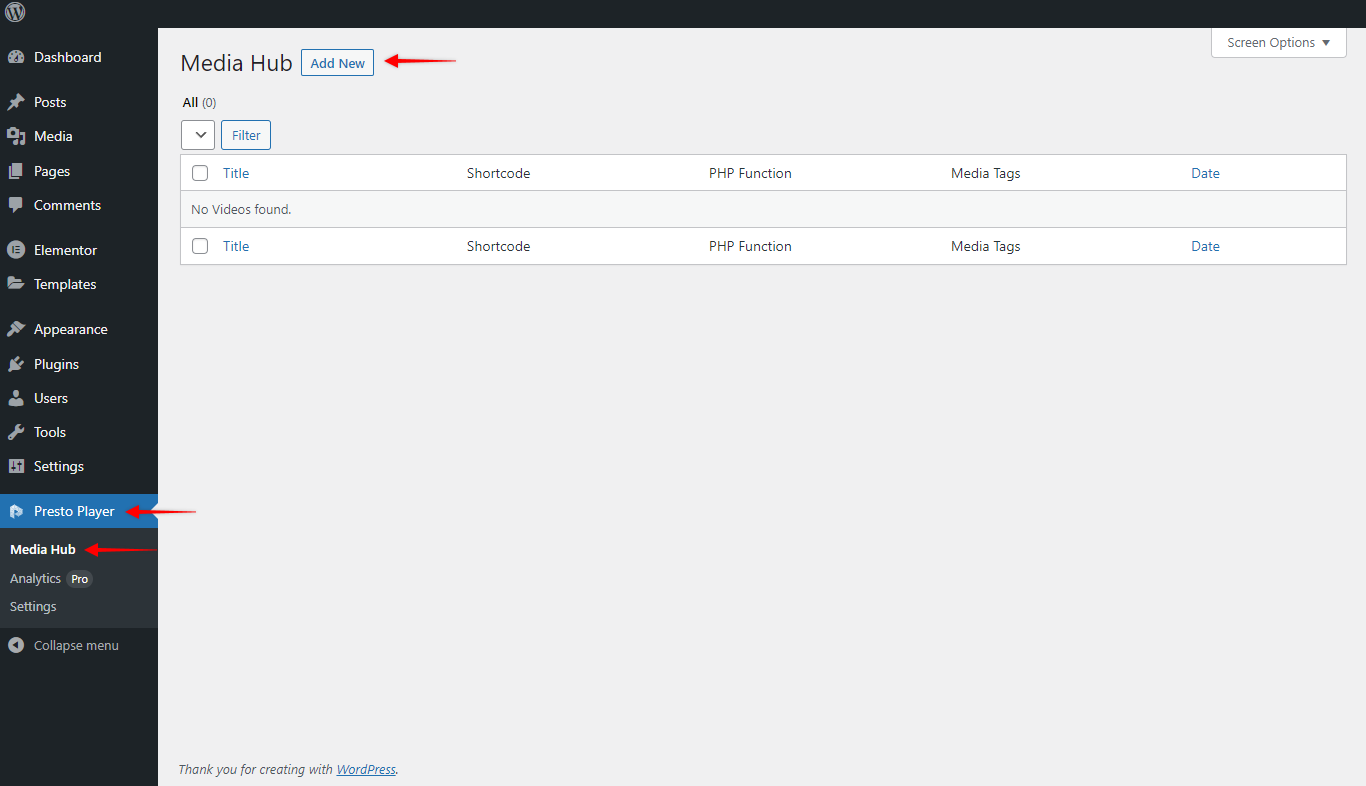
Step 2: Select your video source. You can choose from self-hosted Video, YouTube, Vimeo, or Bunny.net (Pro).
Step 3: Enter the video URL and click Add Video.
Step 4: Once the video loads, adjust any settings you need, such as presets, chapters, or branding. Click Publish to save.

Add the Video to Beaver Builder
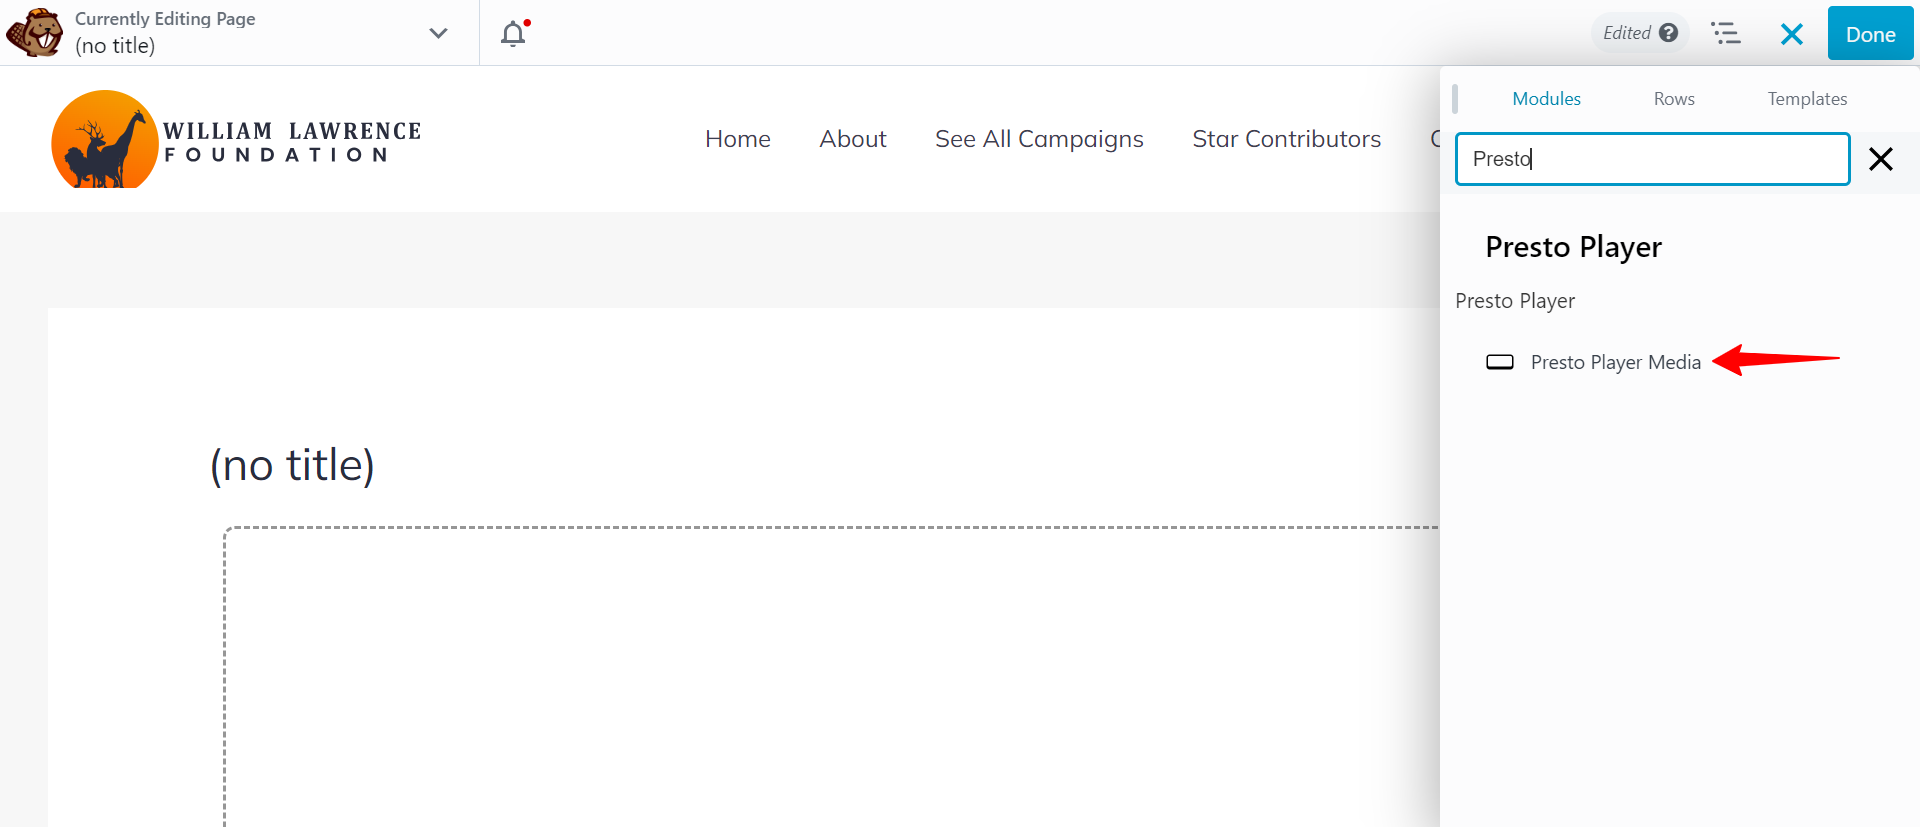
Step 5: Open your page in Beaver Builder. Search for the Presto Player Media module and add it to your layout.
Step 6: In the module settings, use the dropdown to select the video you just saved.
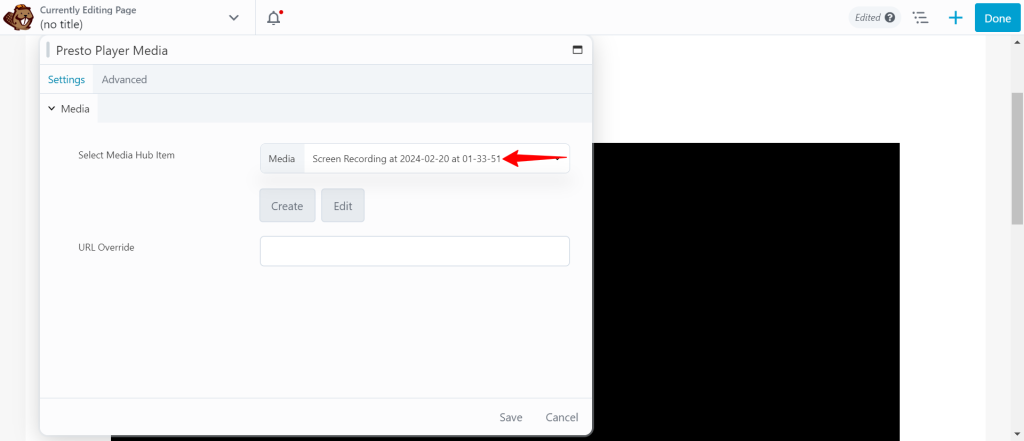
Step 7: Click Edit to open the video back in the Media Hub and adjust settings, or click Create Video to add a new one.
Step 8: If you use Beaver Themer and post type layouts, you can also set a Dynamic URL to pull the video URL from a custom field automatically.
Conclusion
That’s all it takes to add Presto Player video to a Beaver Builder page. If you run into any issues, feel free to reach out to our support team. We’re happy to help.
We don't respond to the article feedback, we use it to improve our support content.