- Bunny.net Setup
- Using Presto Player With Elementor
- Using Presto Player With Gutenberg
- Using Presto Player With Beaver Builder
- How To Use BunnyNet With Presto Player
- Optimize Video SEO with Presto Player & RankMath
- Using Presto Player With LearnDash
- TutorLMS
- Using Presto Player with Fluent CRM
- Bunny.net Video Library Integration With Presto Player
Using Presto Player with Fluent CRM
To get started with Presto Player and Fluent CRM, first be sure you have installed and activated the Fluent CRM plugin. Our integration will take care of the rest.
Creating an Email Capture
To add email capture to your video, you first need to add it to a preset. This lets you use your email capture display and settings in multiple videos on your site, and also lets you update it in one place, should you need to.
1. Create or Edit a Preset
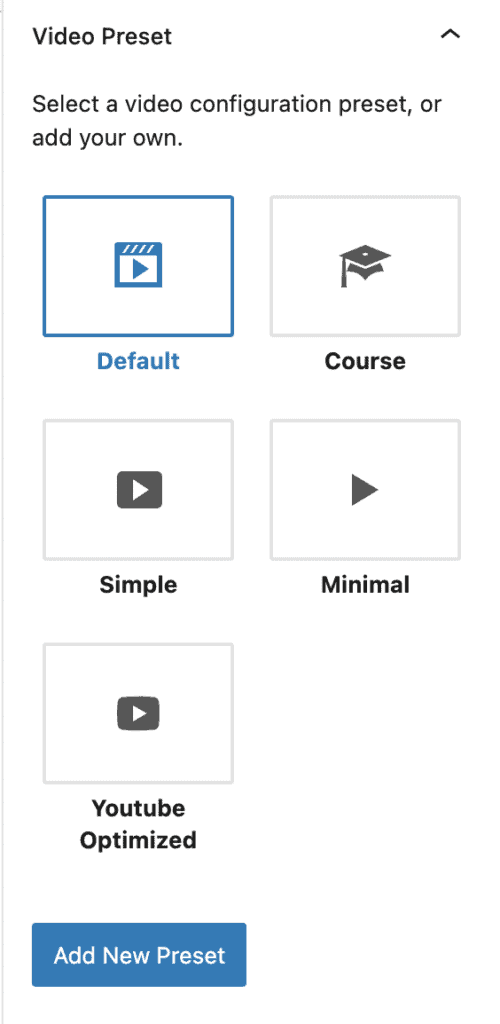
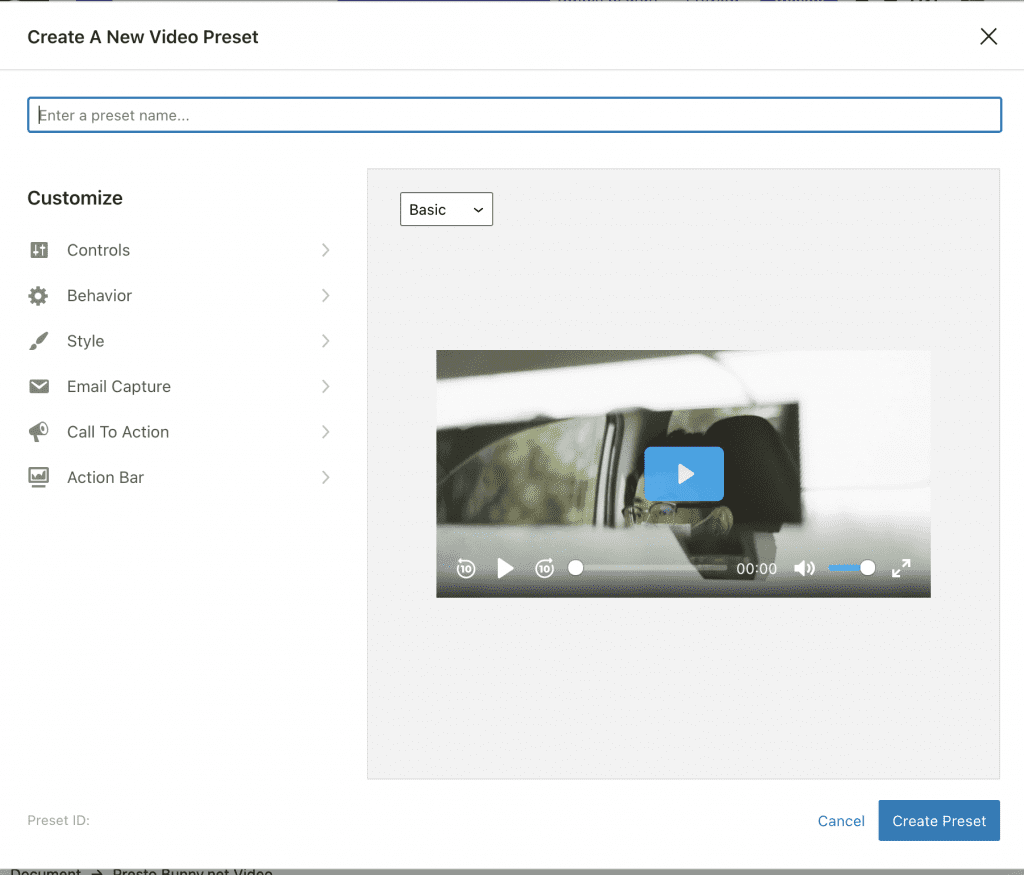
Begin by adding a Presto Player video to your page, or in the Media Hub. Then click “Add New Preset” in the inspector on the right side of your screen.

Give your Preset a name and click the “Email Capture” option on the right hand side.

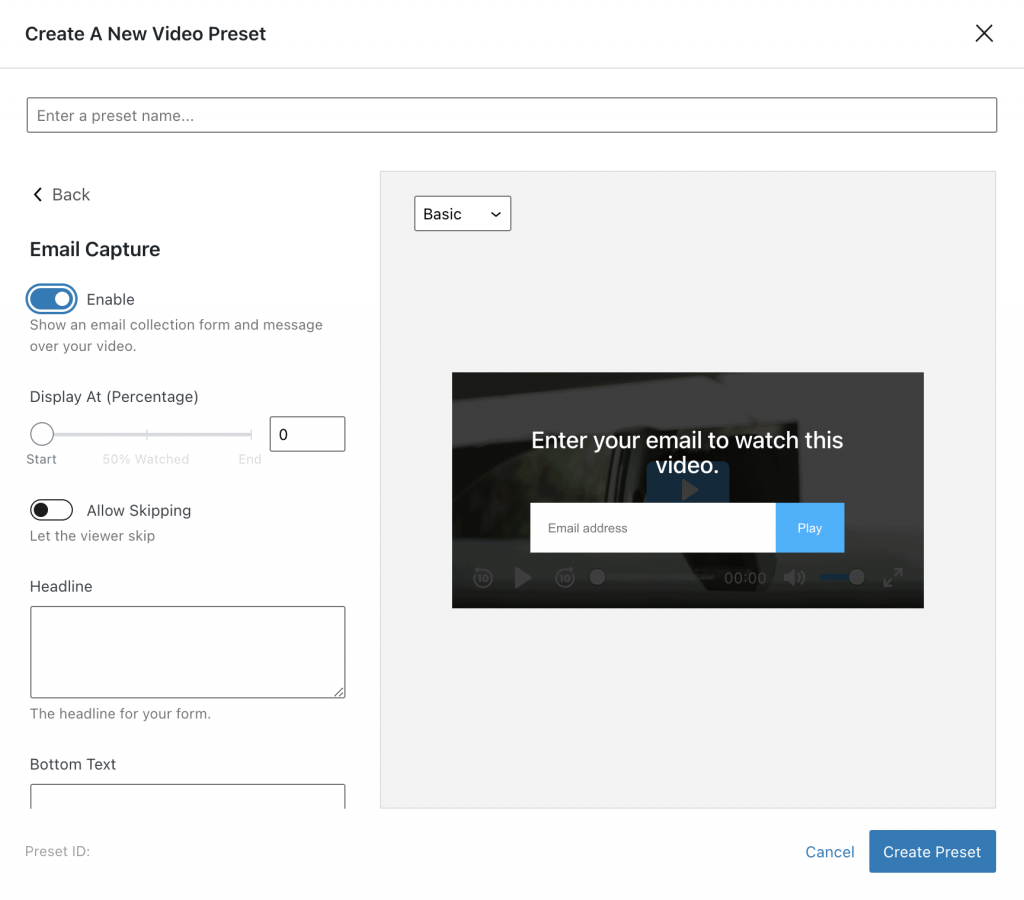
2. Enable Email Capture
Click “Enable” next to the email capture field, then fill out the form fields until you are happy with the text and styling.

3. Select FluentCRM for your email provider.
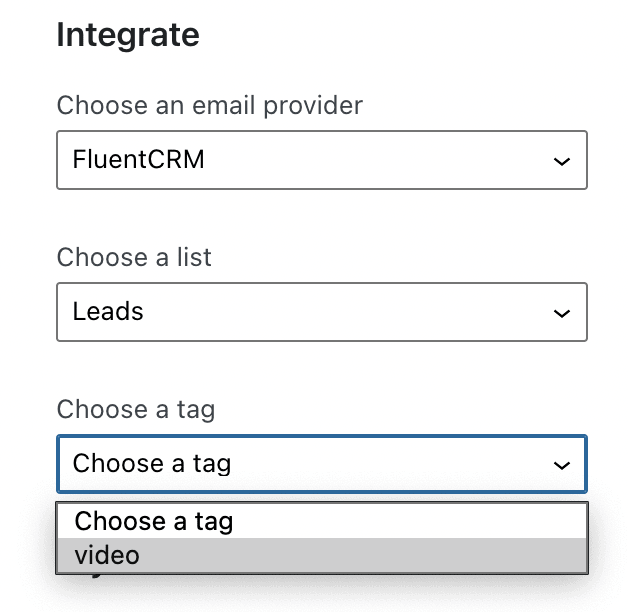
Scroll down to the “Integrate” section and choose “Fluent CRM” for the provider. It will populate two additional options you can choose from:
- Choose a specific list you want the emails to go in.
- Choose and an optional tag.

We do suggest choosing both since this enables some powerful automation features, like Email Sequencing or Contact Segmentation in FluentCRM.
Presto! You’re done.
Be sure to save your preset and your post. Now that you’ve added this to a preset, you can use this on any number of videos on your site. You only need to update the preset settings to update the Email Capture on all your videos with the same preset.
We don't respond to the article feedback, we use it to improve our support content.