How To Capture Emails
Presto Player lets you collect email addresses right from your videos. You can choose to capture an email address at any point during a video, and automatically sync email collection to a list of our providers. This is a Pro feature, available in any one of our paid plans.
Integrate Email Providers
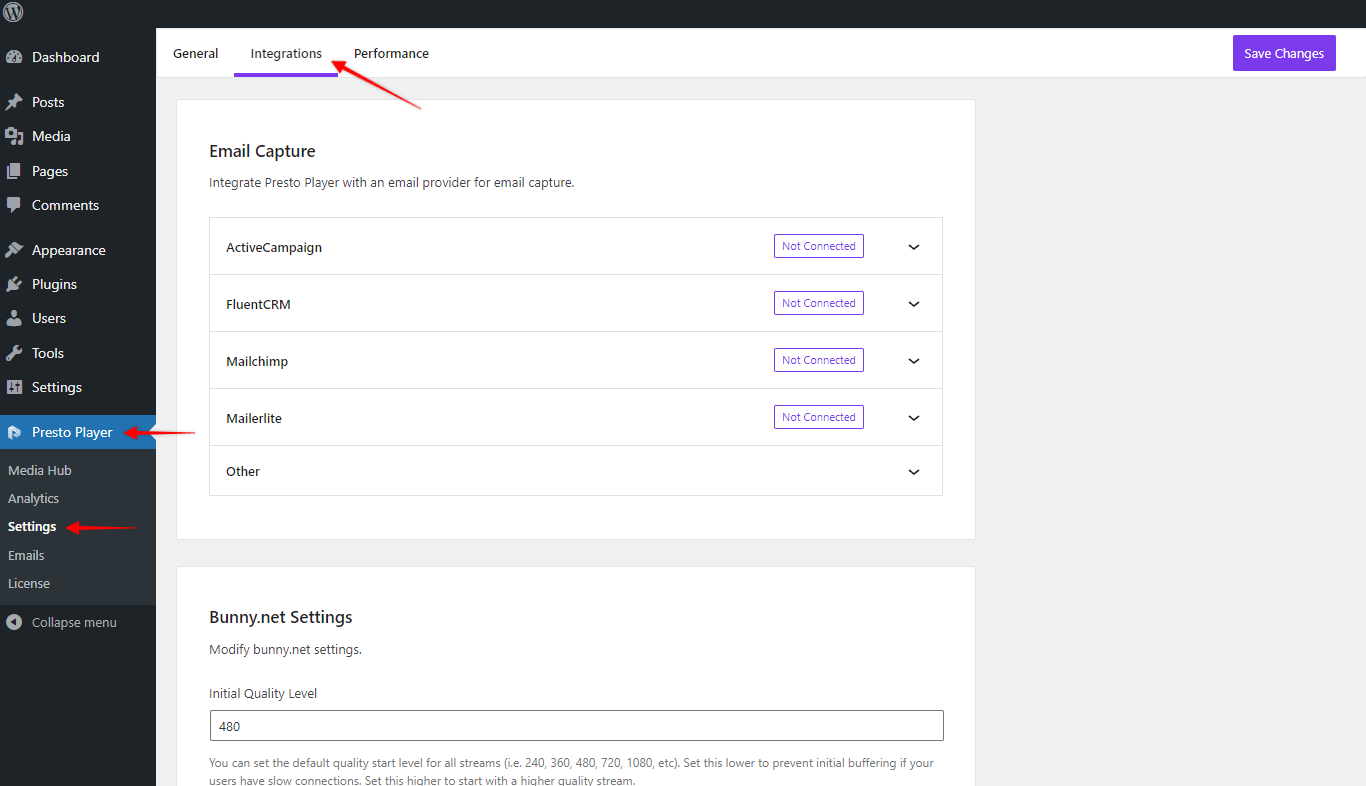
Presto Player makes it easy to connect with email providers. To do this, navigate to Presto Player > Settings > Integrations. You should see the Email Capture field in your settings.

Connecting Providers
To illustrate, we’ll show you how to connect your MailChimp account with Presto Player.
Firstly, you’ll need to get your API key. To do this, login to your MailChimp account and follow these steps:
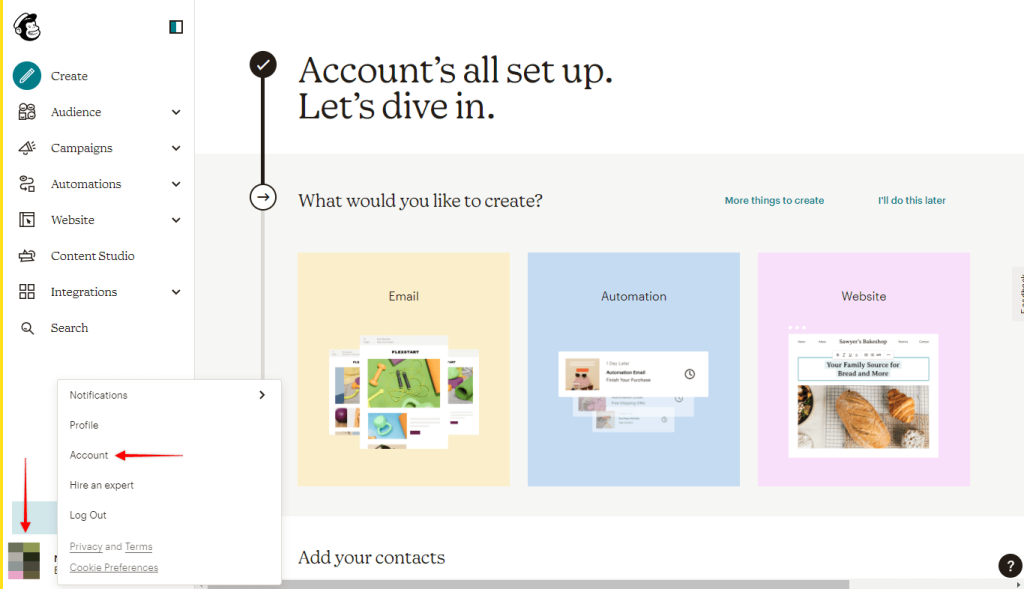
Step 1 – Click on your profile icon in the bottom left corner, and choose “Account” in the popup menu;
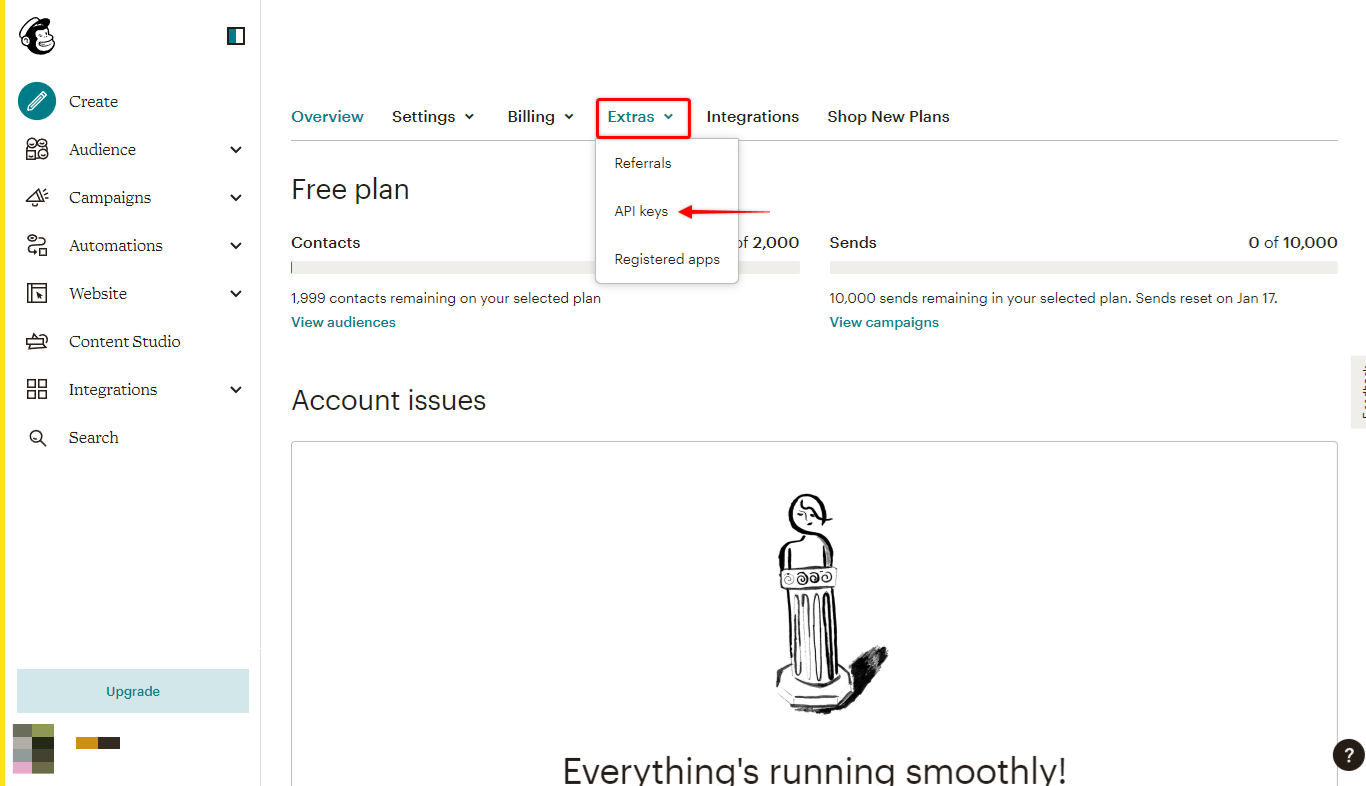
Step 2 – On your “Account” page, click on the “Extra” menu option. Here, click on “API keys”;
Step 3 – Next, on your “API keys” page scroll down a bit and click on the “Create A Key”.
Now you need to add your API key to Presto Player:
Step 4 – Log in to your website and navigate to Dashboard > Presto Player > Settings > Integrations;
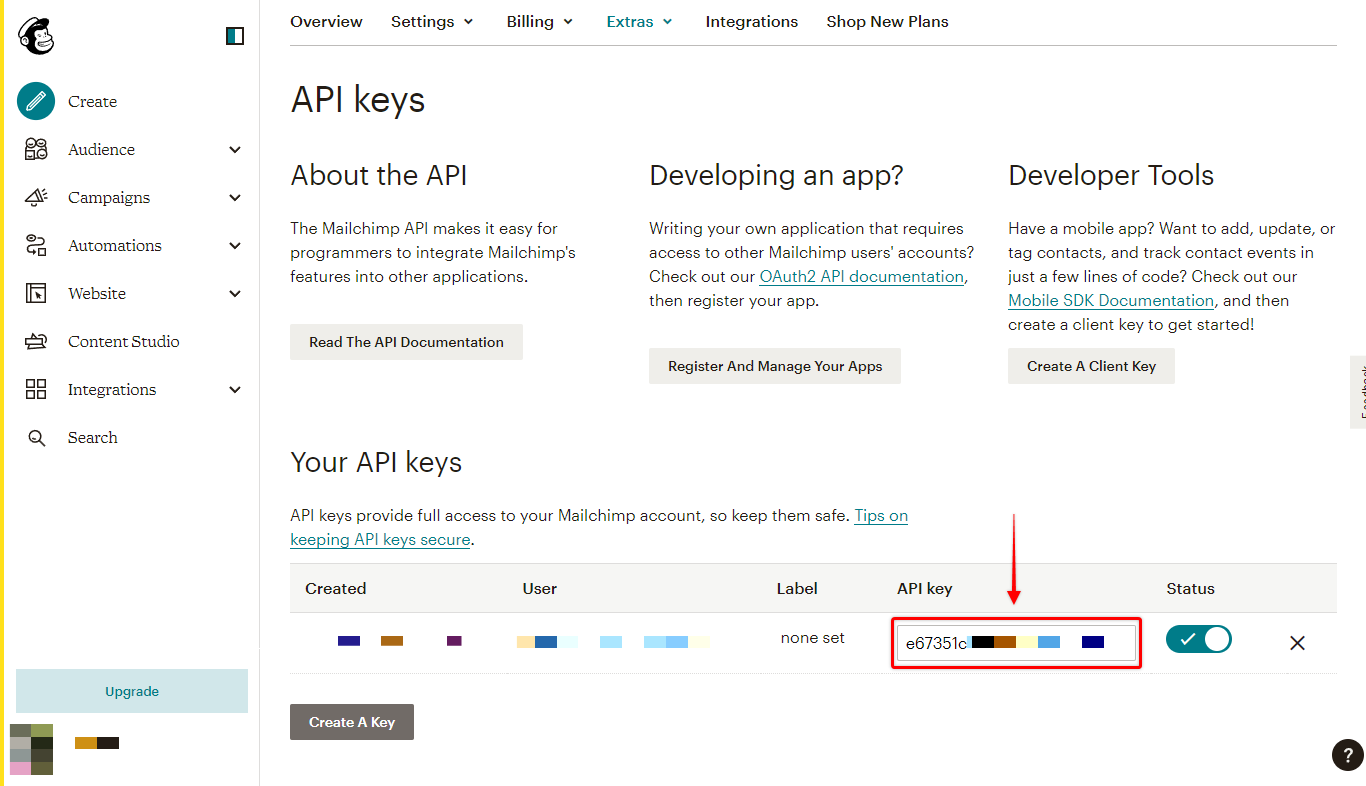
Step 5 – Copy your MailChimp API key you created in step 3;
Step 6 – Expand the “MailChimp” option and add your MailChimp API key in the appropriate filled. Click “Connect”. Don’t forget to click on the “Save Changes” (top right corner) to finish the process;
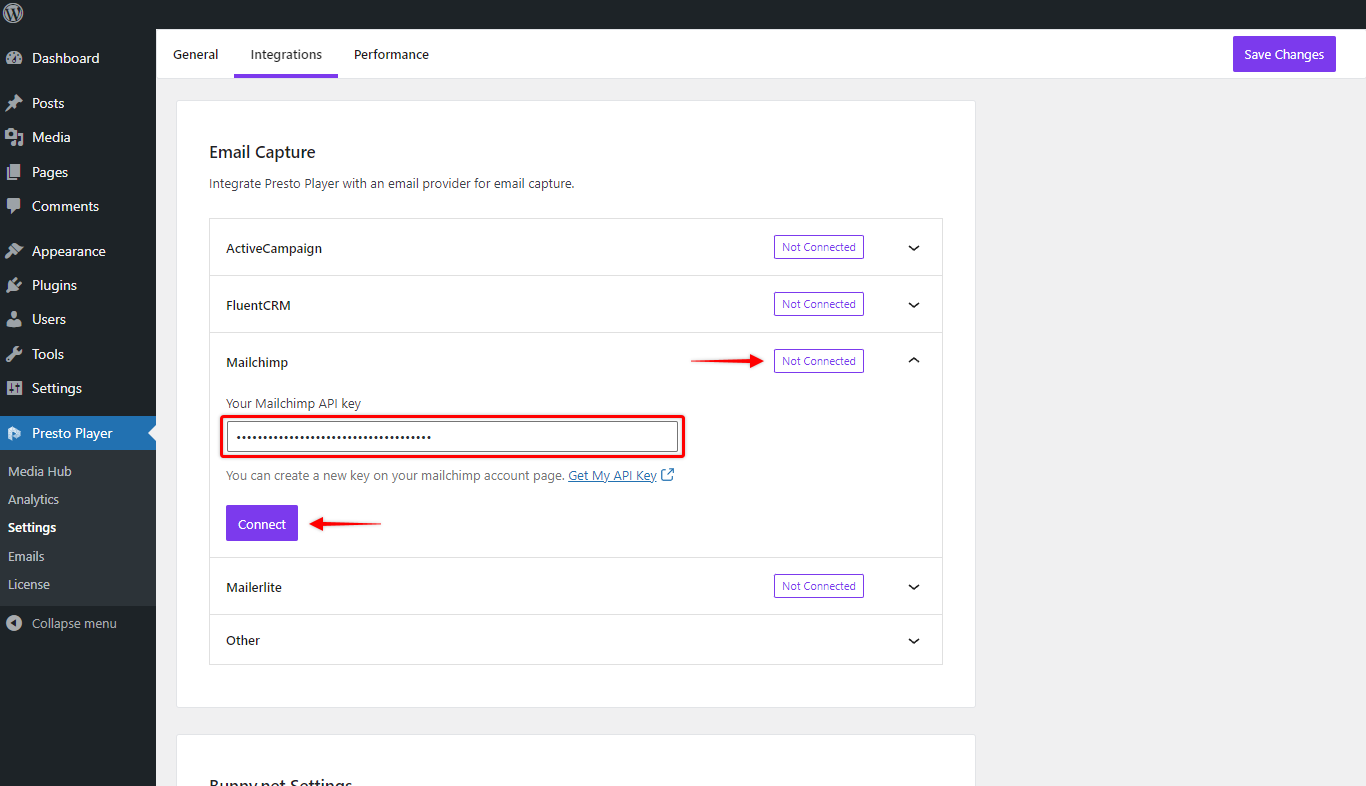
Now you can set your videos to capture e-mail by setting up the presets.
Email Capture Setup
Let’s enable the email capture for your videos:
Step 1 – Navigate to your video page or post, and click on the Presto Player block;
Step 2 – On the right side, under the block options, scroll to “Video Settings”. here, add click to add a new preset or modify an existing one;
Step 3 – In the popup, find the “Email Capture” option in the left side menu. Click on it, and then click on “Enable”. Ina addition, you’ll have some additional settings available here;
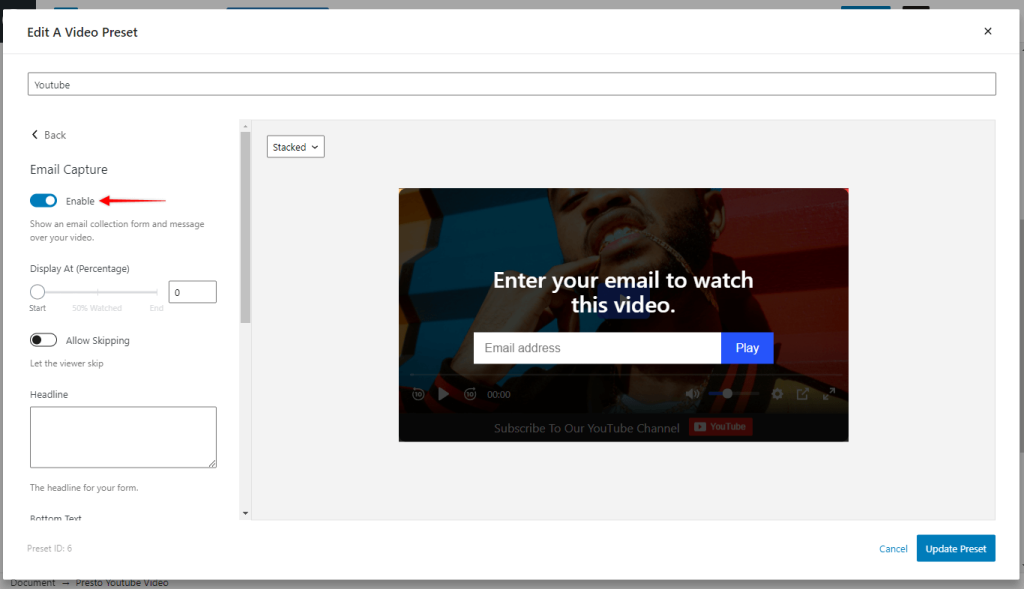
Step 4 – Once you’re done, click on “Update Preset” (or Save Preset).
You did it. Now, any video on which you applied this preset will require users to add email before watching the video.
We don't respond to the article feedback, we use it to improve our support content.