Presto Player Audio
Since version 1.8.0 Presto Player comes with the “Presto Audio” block for Gutenberg. With Presto Player Audio block, add and play audio files on your website easily.
In addition, you can customize your player, add a call to action, or enable the email capture option. Also, next to Gutenberg, you can add Presto Audio with other page builders by using the media hub or shortcode.
Presto Audio
Presto Audio block supports adding MP3 or WAV files to your website. Further, you have a great number of options available with the Presto Audio player. Firstly, the player comes with all needed play controls:
- Play button
- Rewind & Fast Forward
- Progress Bar
- Current Time
- Volume
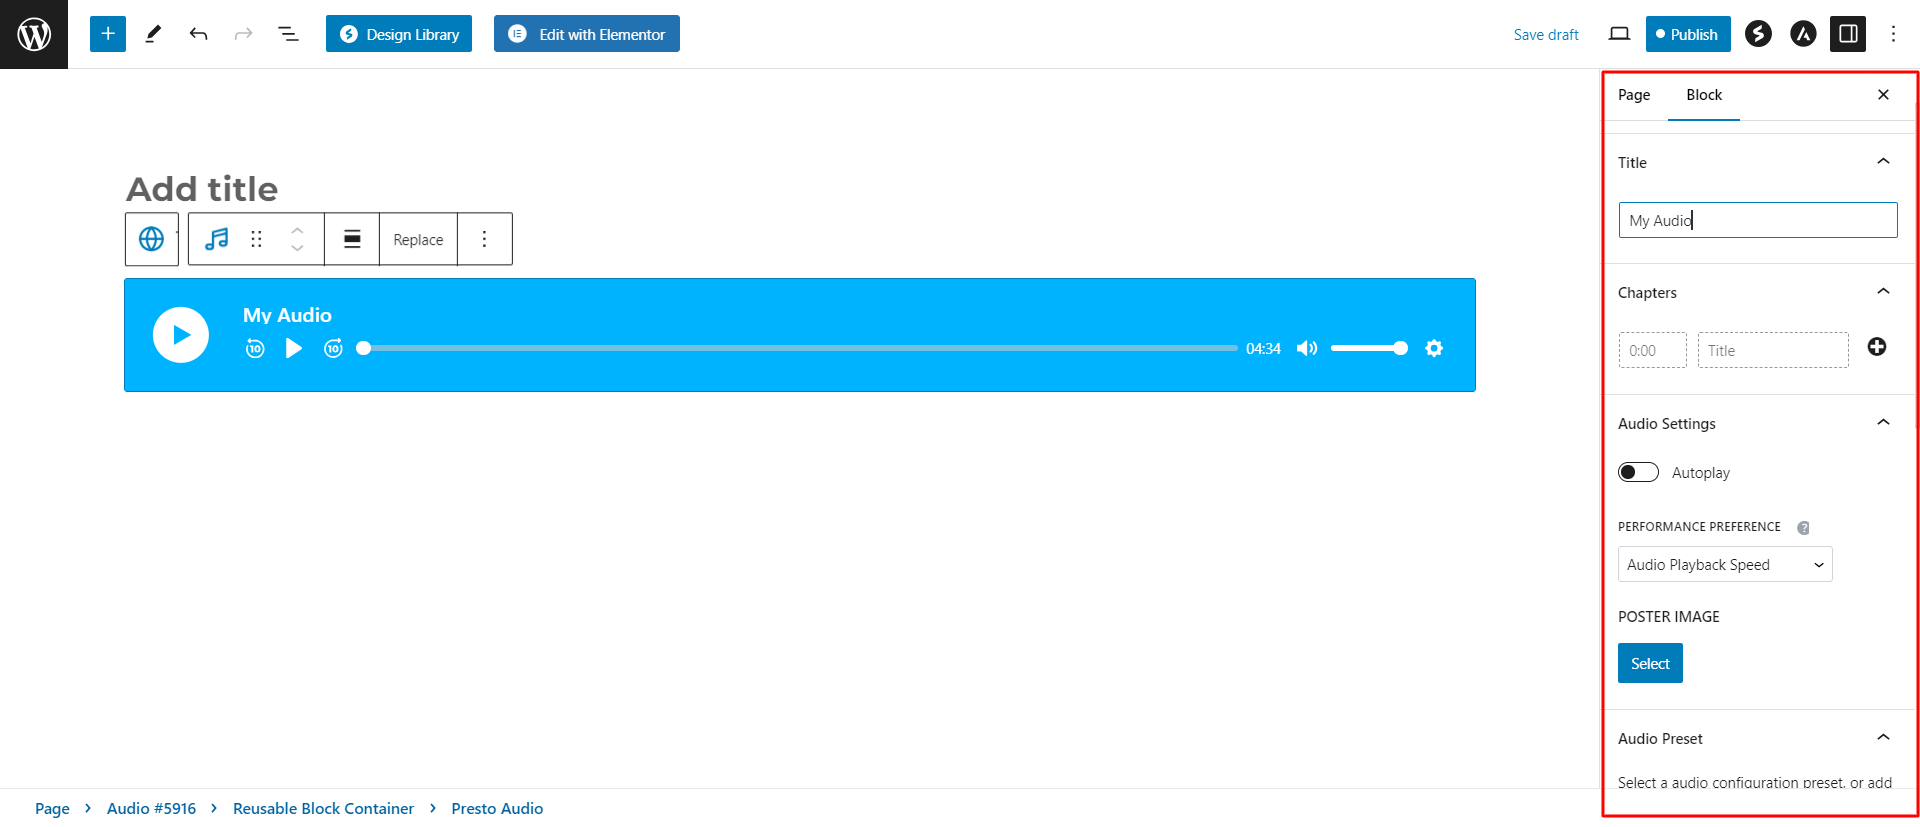
Secondly, there are quite a few options available with free Presto Player. Once you click on the Presto Audio block, check the right-side panel for these settings:
- Title – edit the displayed title of your added audio;
- Poster image – you will find this option under the “Audio Settings” section. Here, you can add your audio cover image;
- Presets – you can choose between four alternative premade layouts (presets): Default, Simple, Minimal, or Course;
- Global Player Branding – you can set the Audio block background color.
Presto Player Pro
In addition, if Presto Player Pro is activated on your website, you will see additional options. Thus, you can create chapter markings (Chapters) and add your custom presets (Add New Preset).
Further, when creating a custom preset, you can set the layout to Basic or Stacked. Now, add other settings to your custom preset:
- Controls – choose which controls should be displayed;
- Behavior – you can opt to save the user’s play position from the previous visit (Save Play Position), play audio only if it’s visible (Focus Mode), stick audio to the side of the screen (Sticky On Scroll), and choose what happens once the audio ends (On Audio End);
- Style – here, you can set color for audio controls, and set round corners;
- Email Capture – enable this option to customize and add an e-mail gate at the beginning or any part of the audio. This will require users to add their e-mail addresses to listen to the audio;
- Action Bar – you can add a notice bar with the call-to-action button at the player bottom. You can also customize it and decide when it should be displayed;
- Call To Action – this option will add an overlay with the call-to-action button over your audio. Users will be required to visit your link to play the audio.
Adding Presto Audio To Your Website
Presto Player v3 introduces a new feature that streamlines the process of adding videos to your WordPress site.
Previously, you had two options for adding videos to your site:
- Using the Presto Player block directly in the Gutenberg editor.
- Uploading the audio to the Media Hub first and then inserting it into your page using the shortcode or block.
With automatic syncing, any new video you add through the Presto Player block in the Gutenberg editor will now be automatically added to your Media Hub as well. This ensures all your audios are stored in a central location, making them easier to find and manage later.
How to Add Audio to Post or Page
You can add audio to your individual Gutenberg-built post or page by following these steps:
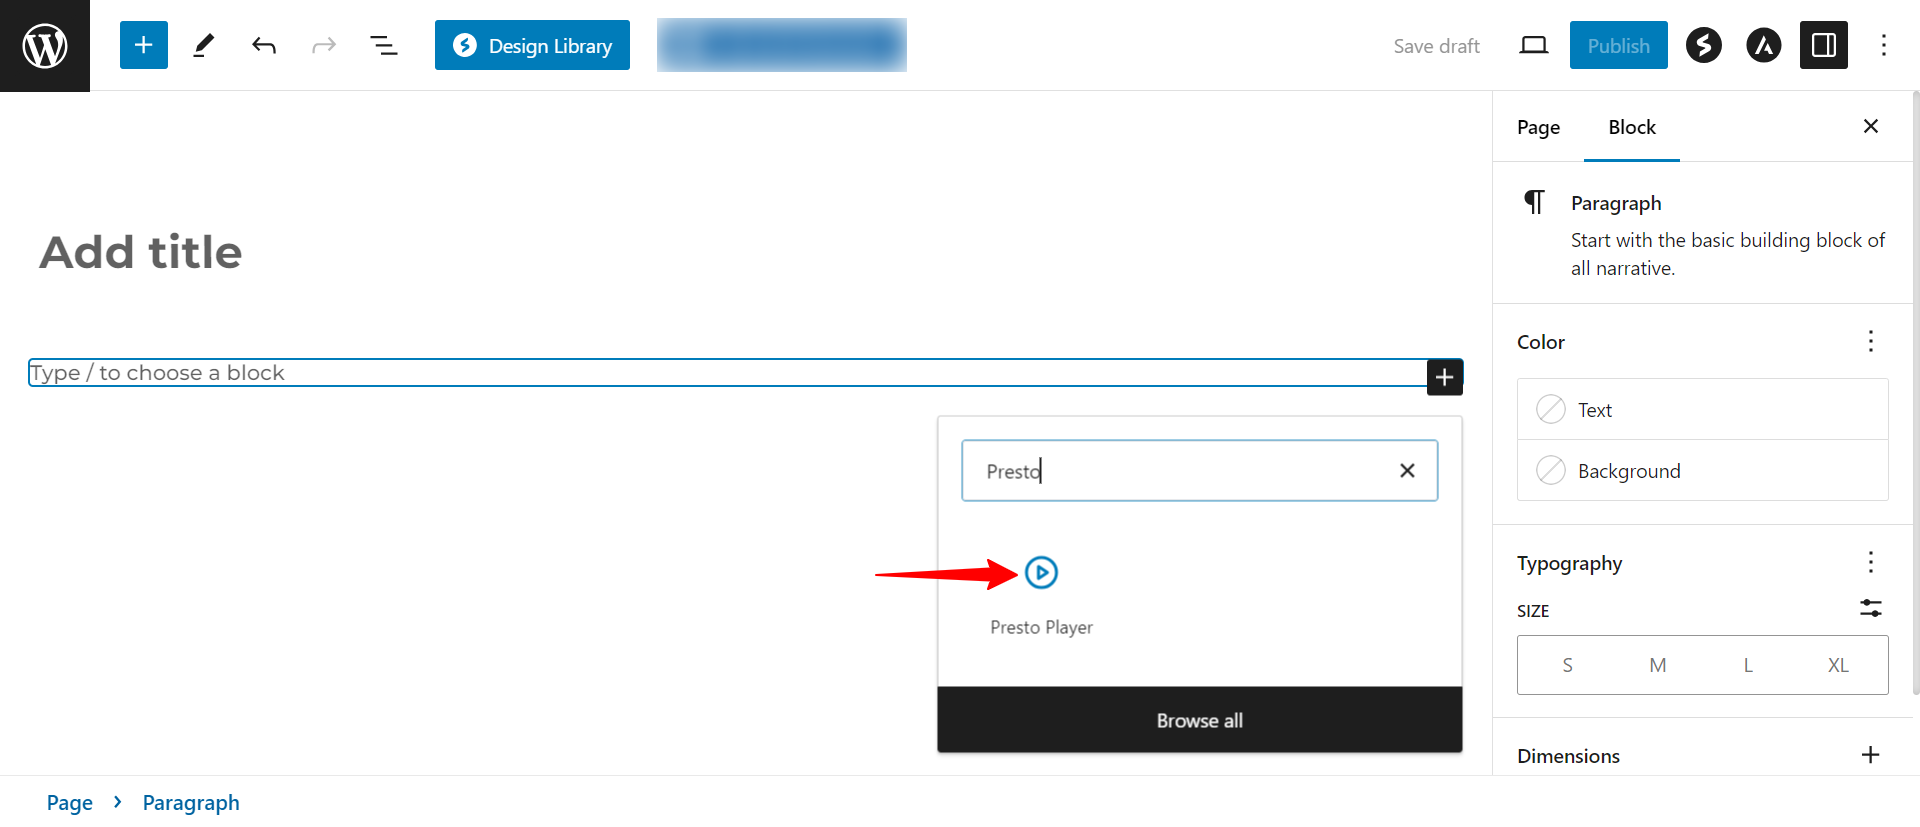
Step 1 – Start editing your post or page with Gutenberg. Here, click to add blocks, search for the “Presto Player” block, and add it to your page or post.

Step 2 – Click on the block, and choose the audio source. This can be self-hosted or the URL of your audio file;
Step 3 – Once the audio is loaded, you can adjust the block settings. Accordingly, you can add Chapters, Autoplay, Add Poster (Cover) image, use presets, add Branding, etc. Click “Publish” to save changes.

Presto! You added audio to your post or page.
Elementor and Beaver Builder
Furthermore, you can add audio using Elementor or Beaver Builder following these steps:
Step 1 – Start editing your page or post with Elementor or Beaver Builder. Search for the “Presto Player Media” widget/module and add it where you want;
Step 2 – You will get several options when clicking on the widget/module. Firstly, choose a media by clicking on the dropdown menu and selecting the “Audio” option, Next search and select the audio you previously saved;
Step 3 – Additionally, you can click on the “Edit Media” to modify the video settings. This will open the media hub to adjust settings like you previously did.
Shortcode
The Media Hub allows you to use Presto Player with non-block-based builders, theme features, and 3rd party plugins. To use the presto_player shortcode on your site, follow these steps:
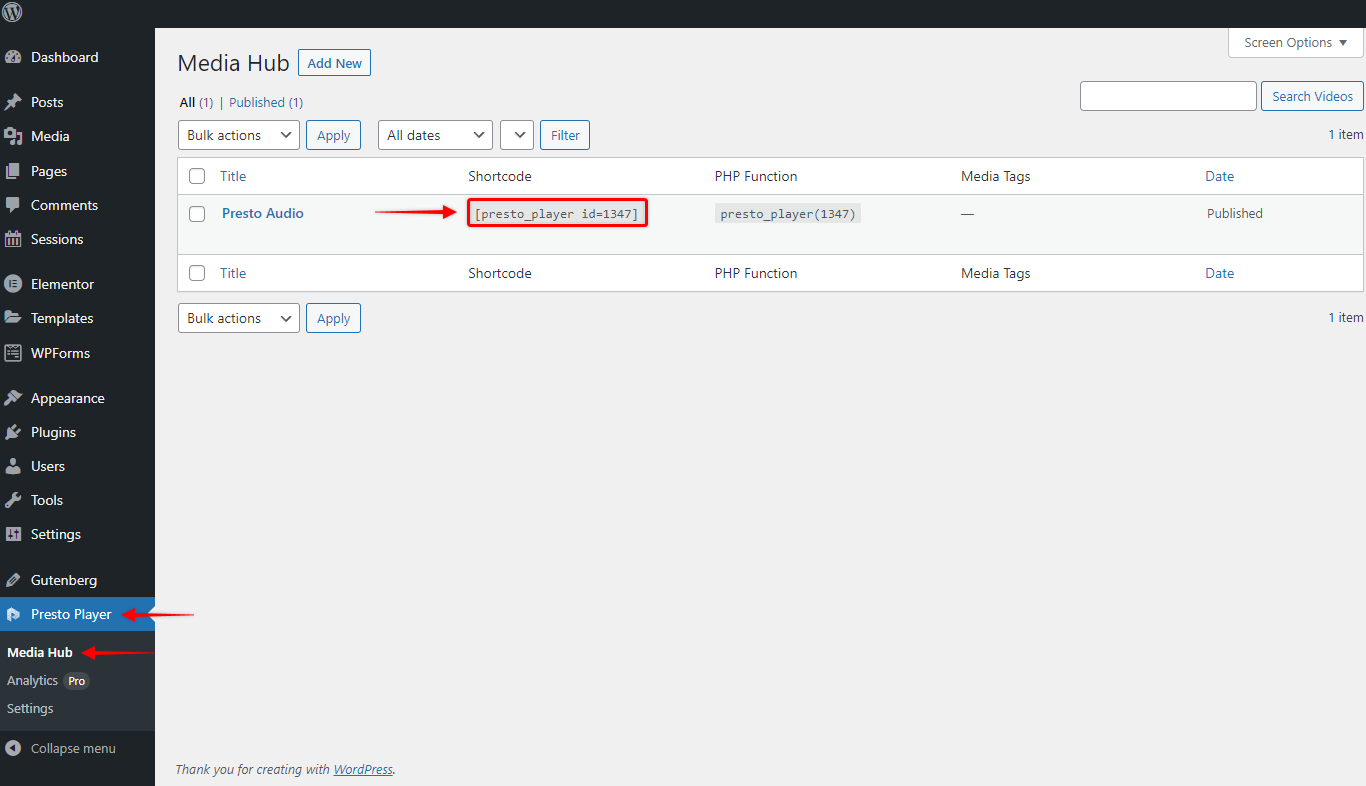
Step 1 – Navigate to Dashboard > Presto Player > Media Hub;

Step 2 – Find the video you need in the Media Hub list, and copy the video shortcode;
Step 3 – Paste the video shortcode to the desired location on your site.
You can find more detailed information on using shortcodes in this article.
We don't respond to the article feedback, we use it to improve our support content.