Using Presto Player With Elementor
Using Presto Player with Elementor is easy!
We have created a custom Elementor widget to make it easy to use video from your Media Hub.
To add your video to Elementor, follow these steps:
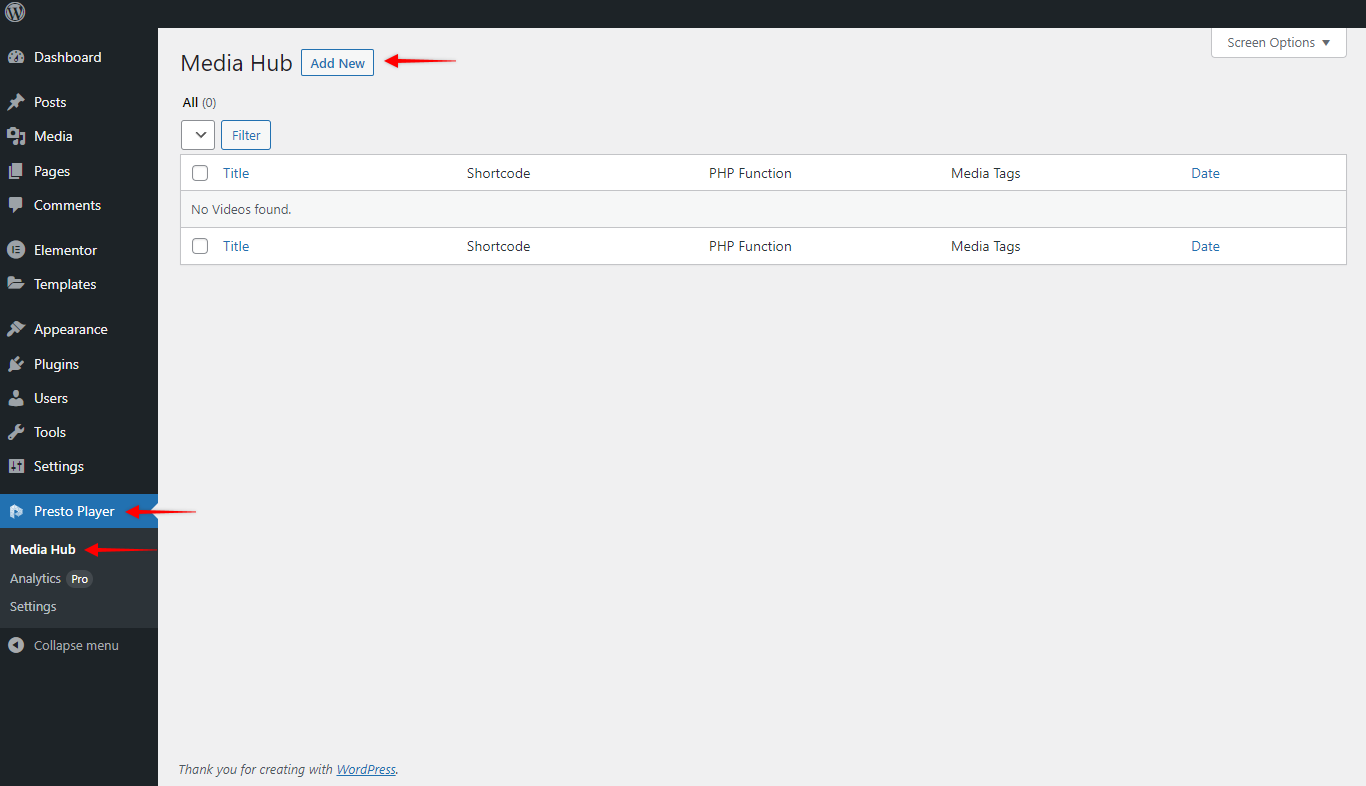
Step 1 – Navigate to Dashboard > Presto Player > Media Hub. Here, click on the “Add New” button, and give your video a name;

Step 2 – Next, select the video type based on where you want to store your video. Thus, you can choose from four different options: (self-hosted) Video, YouTube, Vimeo, or Bunny.net;
Step 3 – To illustrate, we’ll add a YouTube video. Hence, we’ll click on the “YouTube” option, add our video URL, and click on “Add Video“;
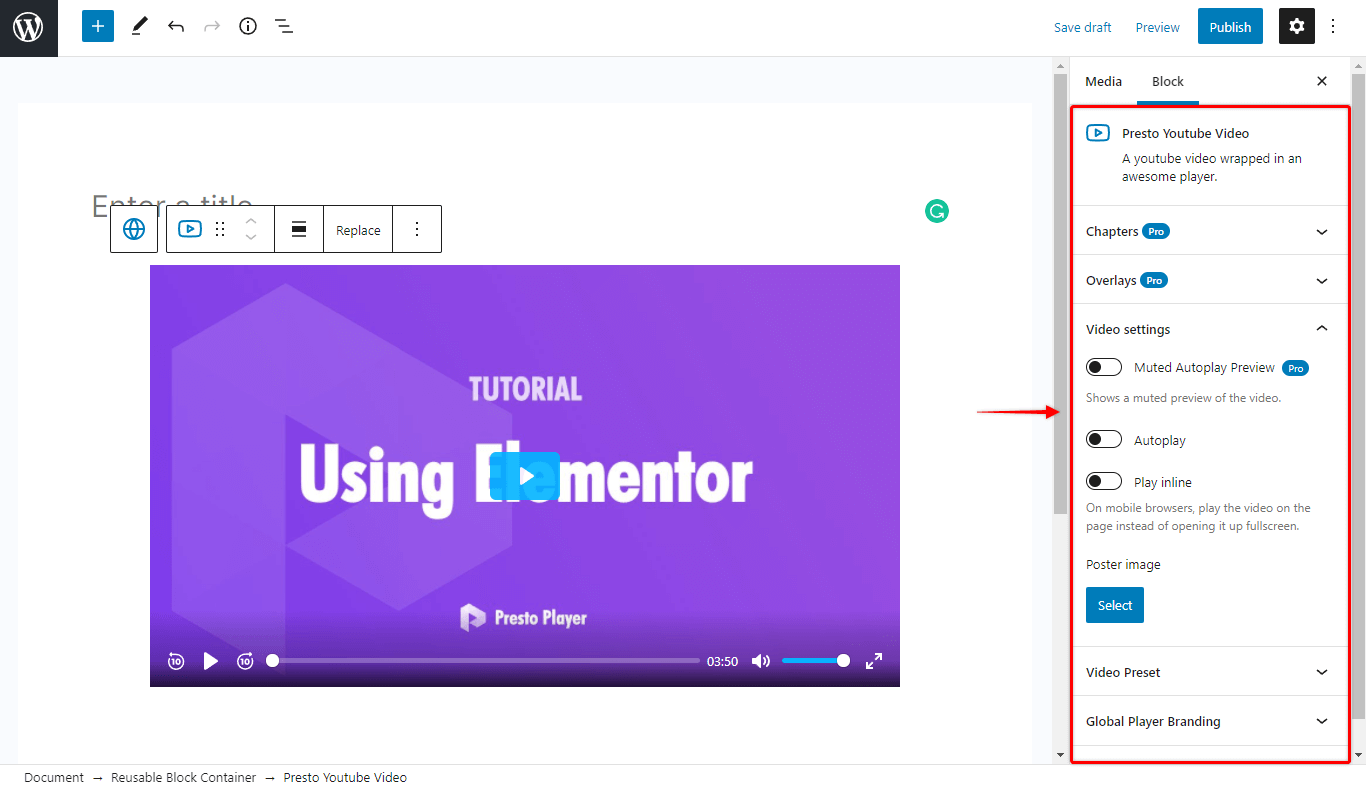
Step 4 – Once the video is loaded, you can adjust the block settings. Accordingly, you can add Chapters, Autoplay, and other video settings, use presets, add Branding, etc. Click “Publish” to save your video;

Now, the video is live, and it’s time to add it to your page or post using Elementor:
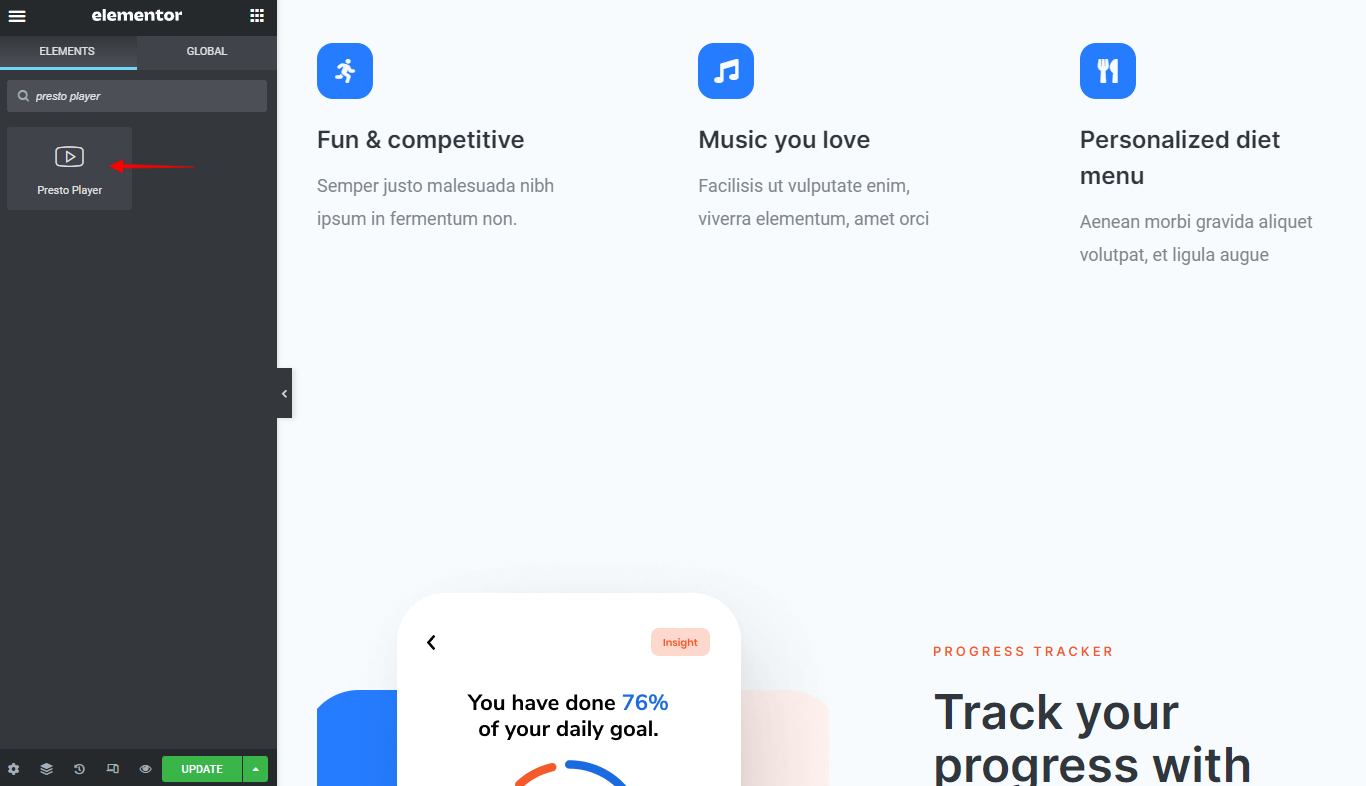
Step 5 – Start editing your page or post with Elementor. Search for the “Presto Player” widget and add it where you want;

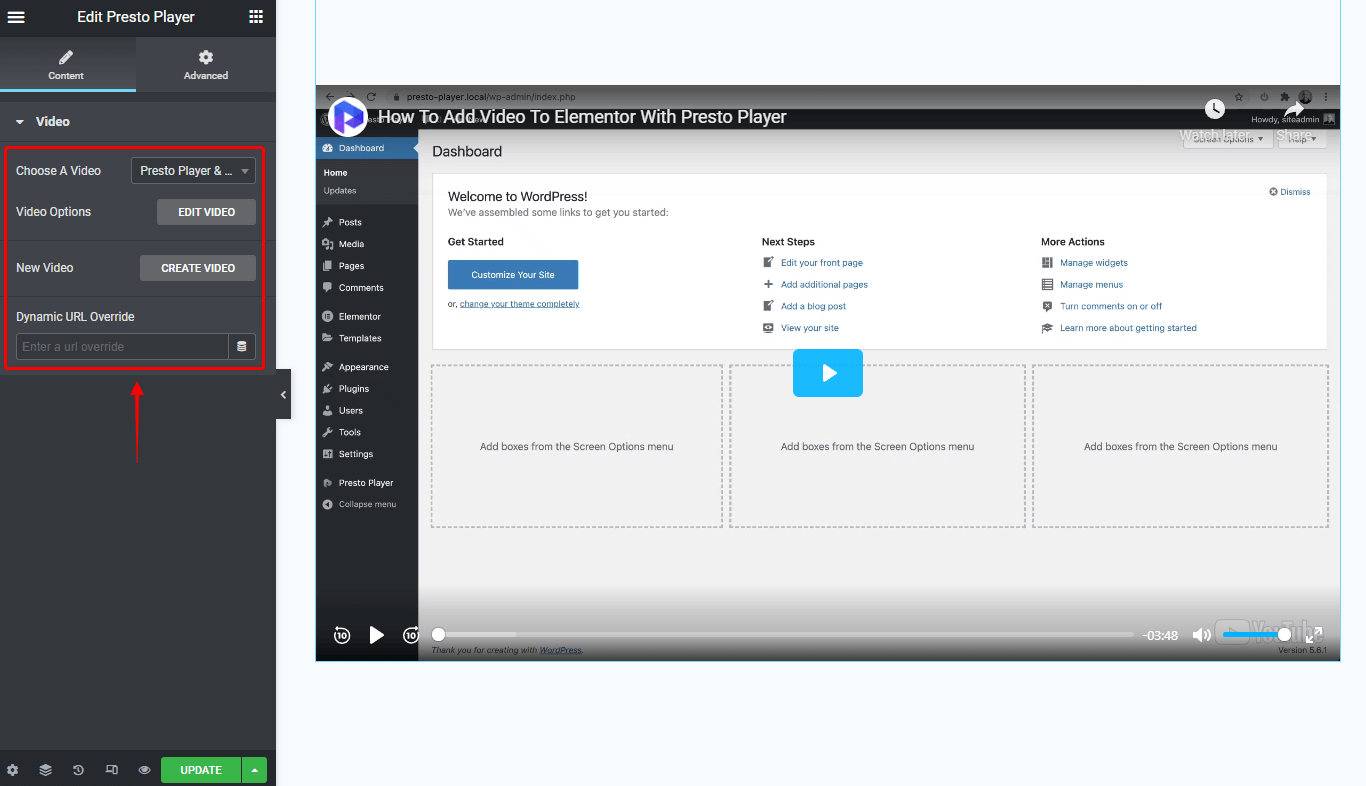
Step 6 – When you click on the widget, you will get several options. Firstly, choose a video by clicking on the dropdown menu and selecting the video you previously saved;

Step 7 – Additionally, you can click on the “Edit Video” to modify the video settings. This will again open the media hub where you can adjust settings like you previously did. You can also click on “Create Video” to create a new video;
Step 8 – Also, you can add the dynamic URL override if needed, and use for example a value inside a custom field, etc.
You successfully added a video using Presto Player with Elementor. And don’t forget you can use the Dynamic URL Replacement feature to replace the link to your video and even use it with Elementor dynamic content feature.
We don't respond to the article feedback, we use it to improve our support content.