How To Use Video Presets
Video Presets are a powerful way to customize the video player experience.
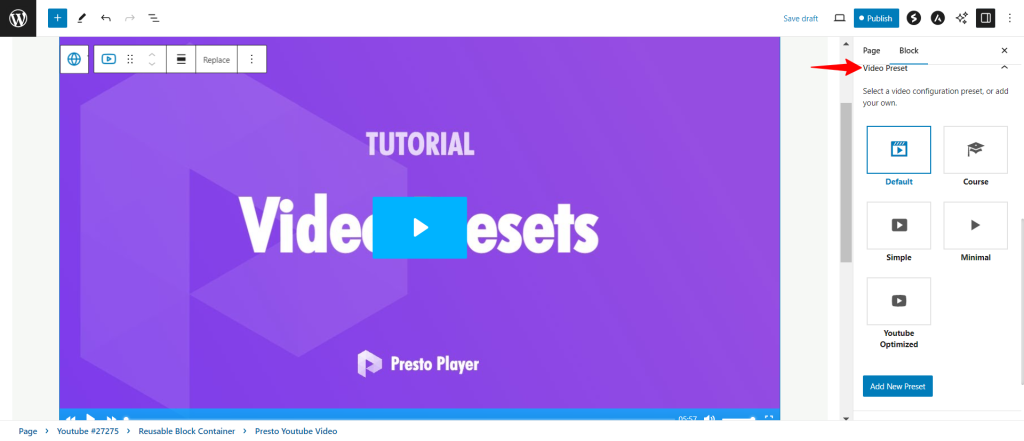
These prests allow choosing a video preset that suits your style of video. Ranging from the Default, Course, Simple, Minimal, and YouTube Optimized.
You can simply choose a preset for your courses and the job is done! This will ensure all your video courses follow the same styling, logo, video controls, and behaviors.
Following are the Video Presets available with the Free version –
- Default
- Course
- Simple
- Minimal
- YouTube Optimized
While the Presto Player’s Pro version allows adding New Presets and to modify the styling as per your requirements.
Let us see how can you edit the presets once you have added the video for the Vimeo/YouTube/Presto Video.
Once you enter the YouTube video using the Presto Player block visit the Block settings from the Right Sidebar and scroll down to Video Preset as shown below.

Now you can either go ahead with the default Presets or you can click on the Add New Preset Button at the bottom to create a new preset.
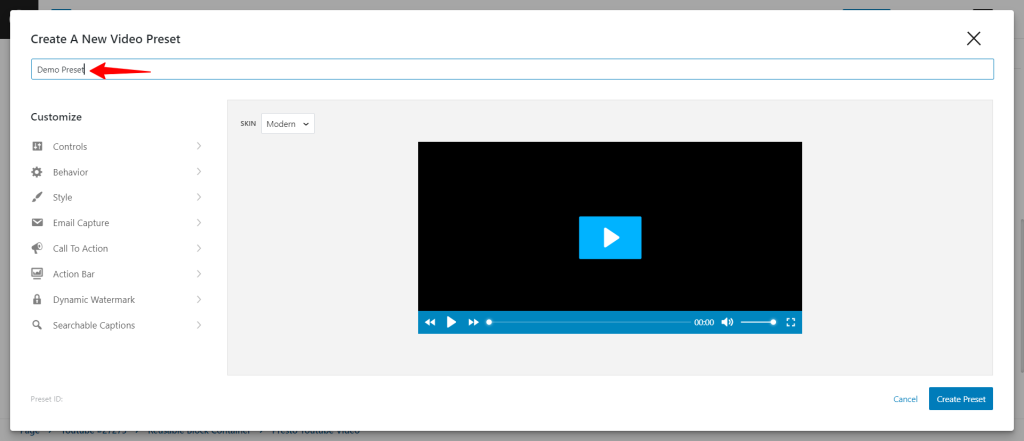
This will display a list of options like Behavior, Controls, Style, Email Capture, Call to Action, Action Bar, and Dynamic Watermark. You can also, name this Preset at the top of the page.

You can edit them as per your style of video category and match your website styling as well.
We don't respond to the article feedback, we use it to improve our support content.