LifterLMS Advanced Videos and Presto Player
When you build courses with the LifterLMS plugin, you might need some additional options for your videos. Therefore, you might need the LifterLMS Advanced Videos add-on. Further, combining LifterLMS Advanced Videos and Presto Player features will give you the best results.
Since version 1.7.0 Presto Player is fully integrated and supports LifterLMS Advanced Videos options. This document will provide an overview of these features and show you how to use them in your courses.
LifterLMS Advanced Videos Features
LifterLMS Advanced Videos allows you to embed videos from Vimeo, Wistia, or YouTube. Further, it enhances the embedded videos by adding the following Video Progression settings:
- Require Video Completion: learners must watch the entire video before progressing to the next lesson or taking a quiz;
- Auto-Advance: once learners finish watching the lesson video, a countdown timer will be displayed. When the time expires, the learner will automatically progress to the next course step;
In addition, the videos will be directly linked to your course reporting. Thus, you would be able to track the progress of each learner better.
You can buy the add-on through the LifterLMS website.
Add Videos With LifterLMS Advanced Videos and Presto Player
Since Presto Player works great with LifterLMS, you can easily embed videos on your courses. If you need help getting started, check this article to learn how to use Presto Player With LifterLMS.
Before starting, you need to install and activate the LifterLMS plugin, LifterLMS Advanced Videos add-on, and Presto Player plugin.
Enable Video Integrations
Firstly, you need to set your LifterLMS integrations:
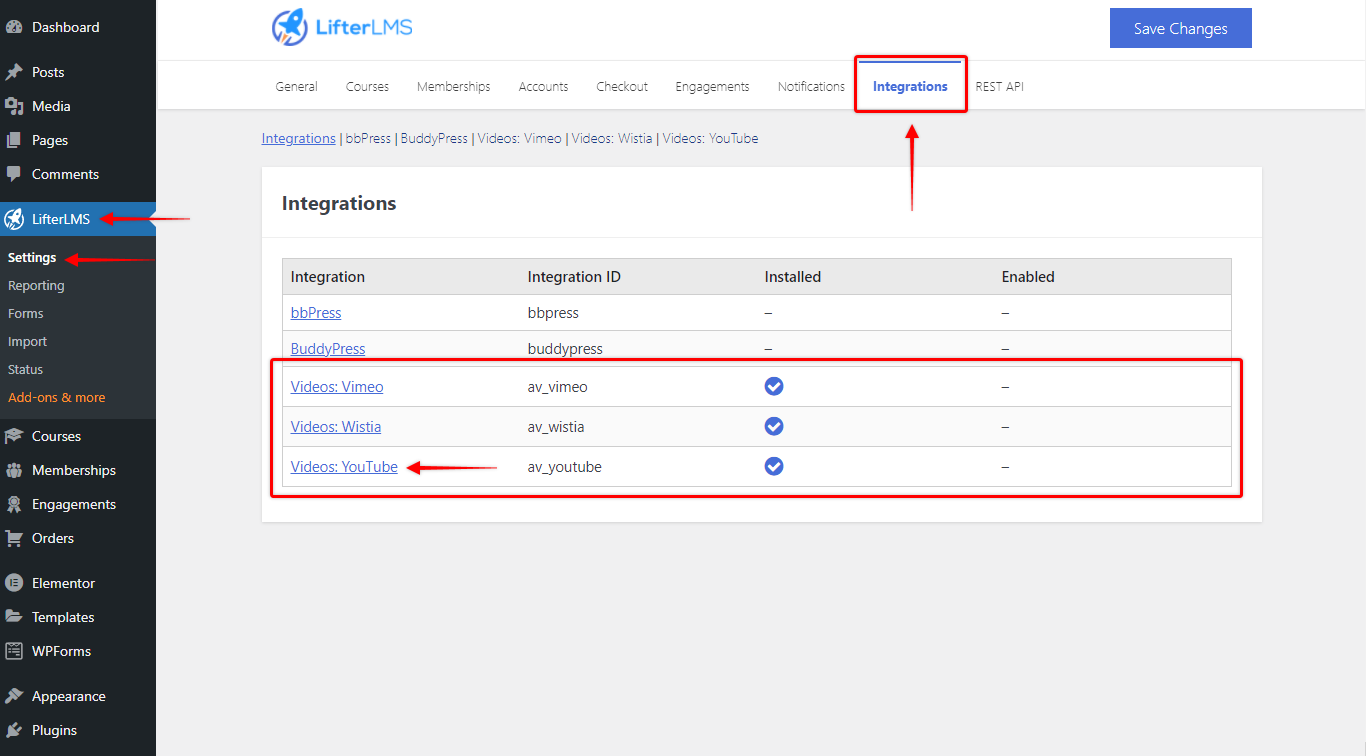
Step 1 – Navigate to Dashboard > LifterLMS > Settings and select “Integrations” tab. Here, you will notice video integration options for Vimeo, Wistia, and YouTube;
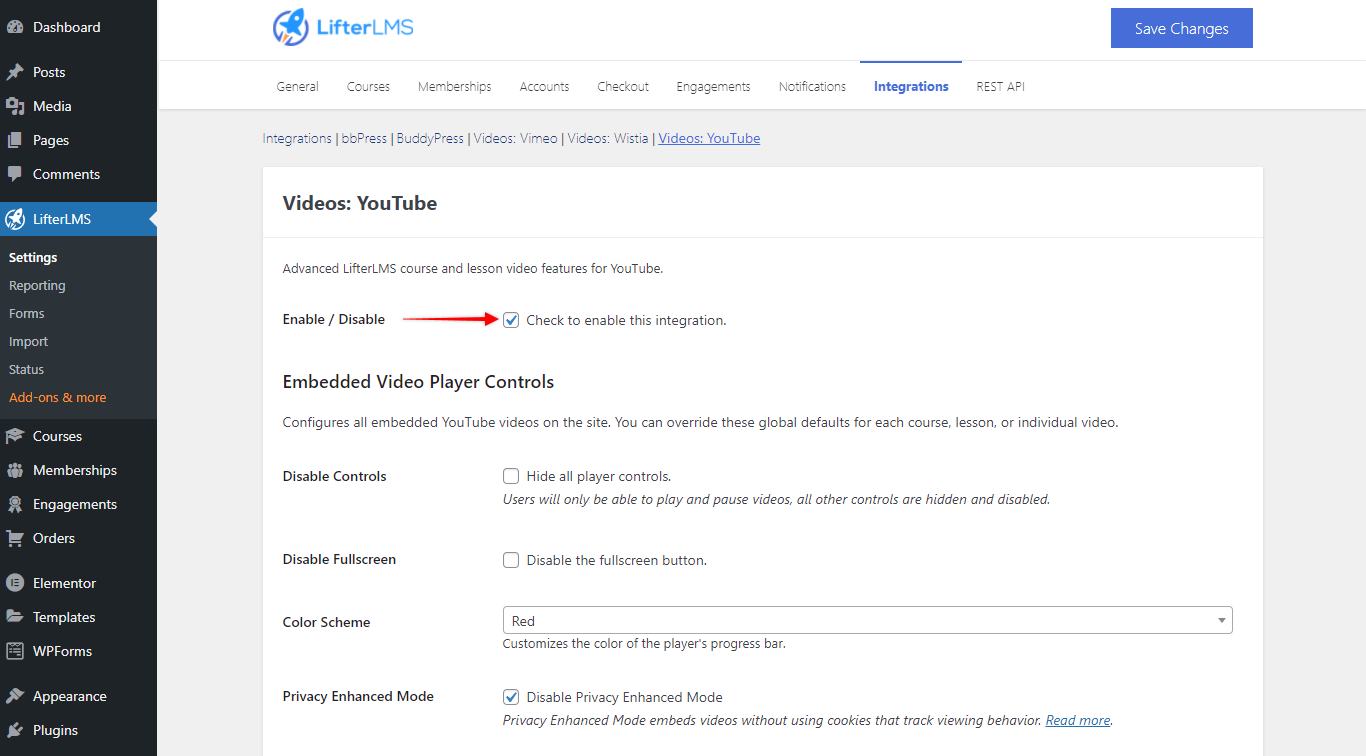
Step 2 – Next, you can enable video options by clicking on any option to open its settings. Now, check the “Enable/Disable” checkbox to enable the desired integration and click “Save Changes”. You need to enable at least one of the video integration options. To illustrate, we will enable YouTube integration and add the YouTube video;
Add Presto Player Videos To Lessons
Now that you enabled video integrations, please follow these steps to add videos to your course:
Step 3 – Set up your LifterLMS course and sessions, and start editing the lesson where you want to add your video;
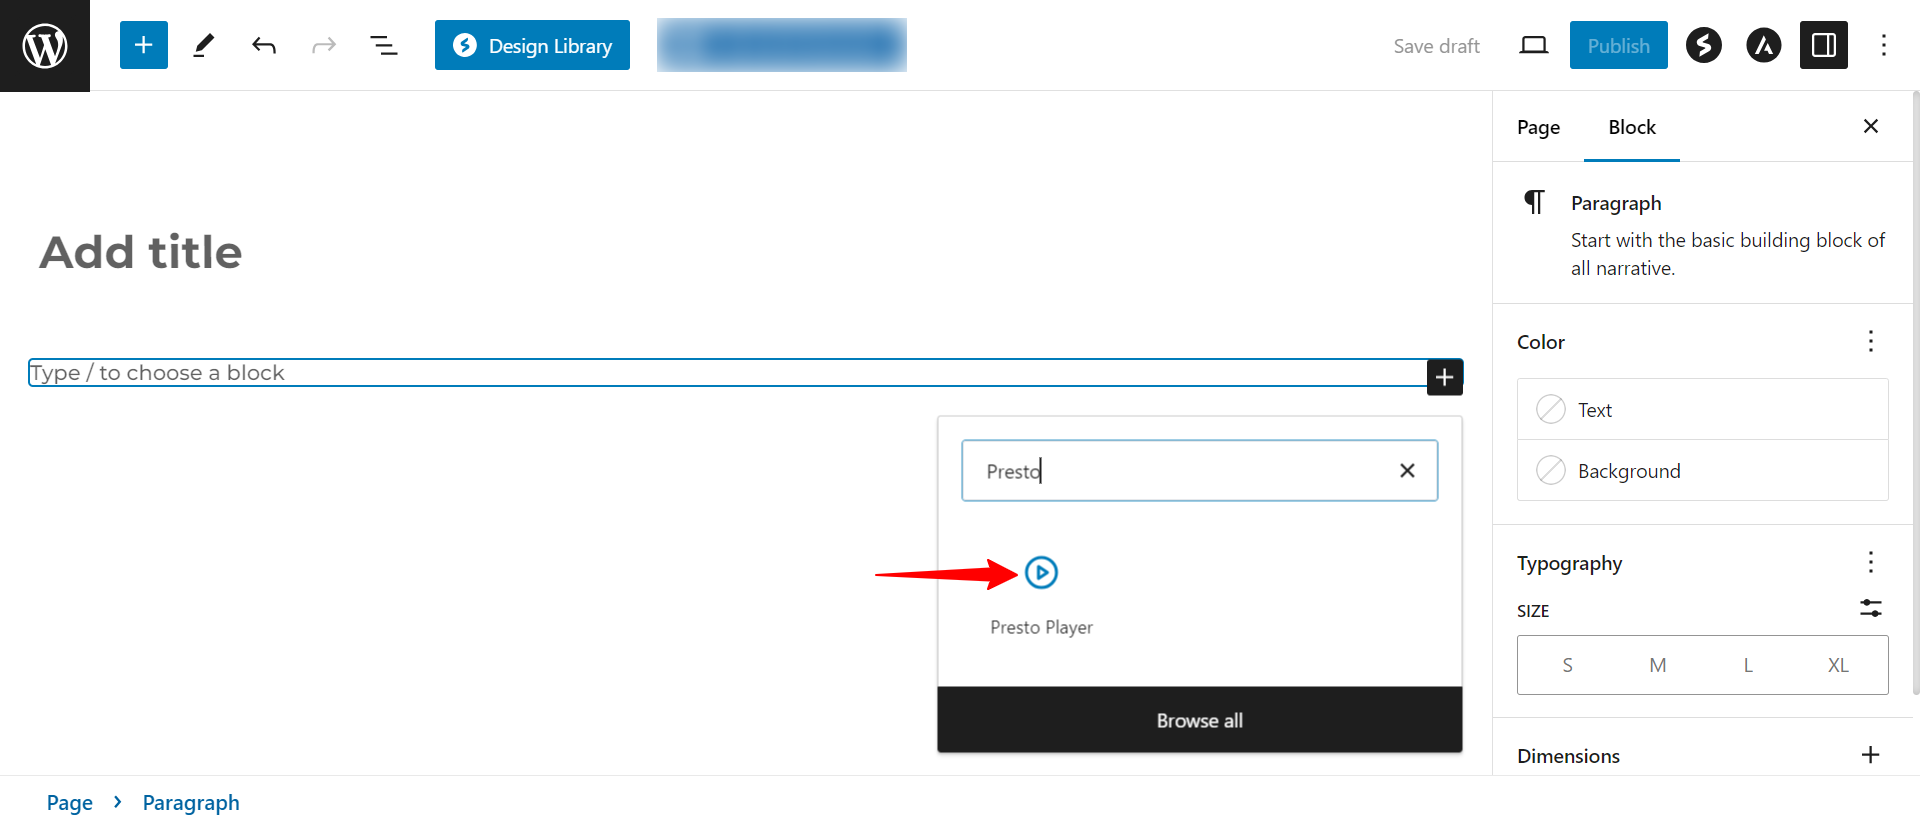
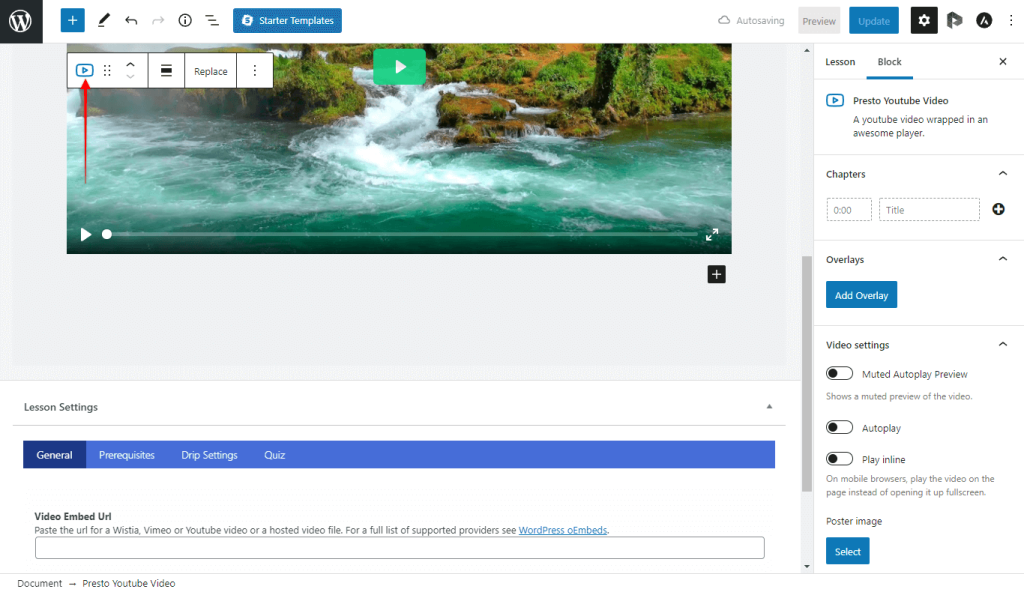
Step 4 – You can add Presto Player video using Gutenberg, Elementor, or Beaver Builder. In this example, we will be adding a YouTube video using Gutenberg editor Presto Player Block. Click the “+” icon and search for Presto Player block.
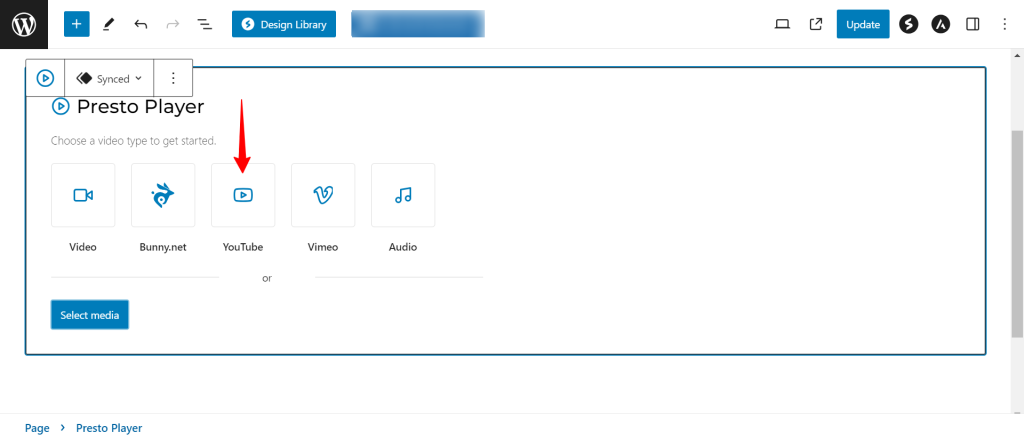
Step 5: In our example, the video source will be “YouTube”;
Step 6 – Add video URL to your block. Keep in mind that you need to add a video to the content area using page builders. The “Video Embed URL” field in the “Lesson Settings” beneath the content area should remain empty;
Step 7 – Once you have added your video URL, you can apply the Presto Player settings you need. When you finish editing your lesson please save changes (Publish/Update);
Video Progression Settings
Finally, it’s time to set your Video Progression Settings:
Step 7 – Navigate to Dashboard > LifterLMS > Settings and select “Courses” tab;
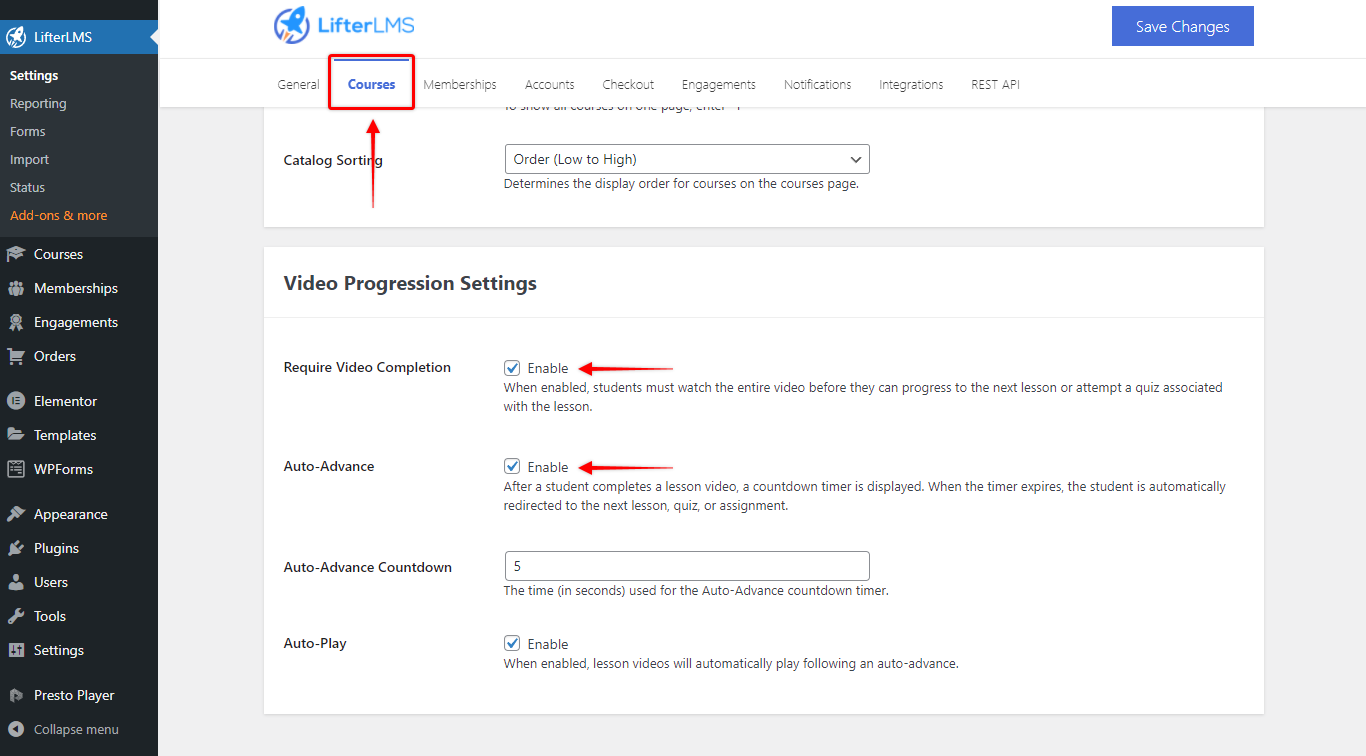
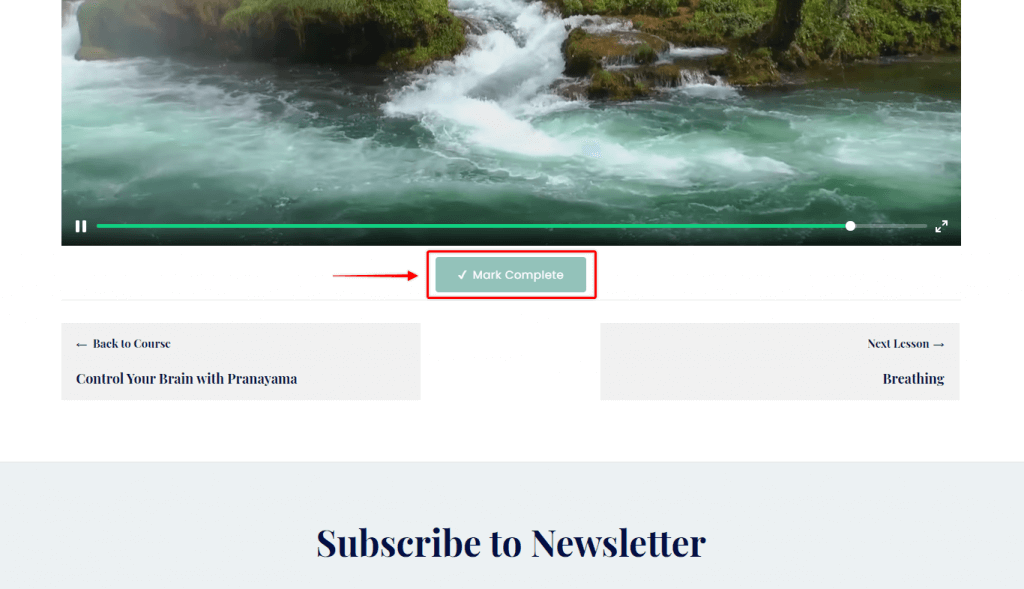
Step 8 – If you want learners in your course to watch the entire video, enable “Require Video Completion”. As a result, the learners will be able to click the “Mark Complete” button only after watching the whole video;
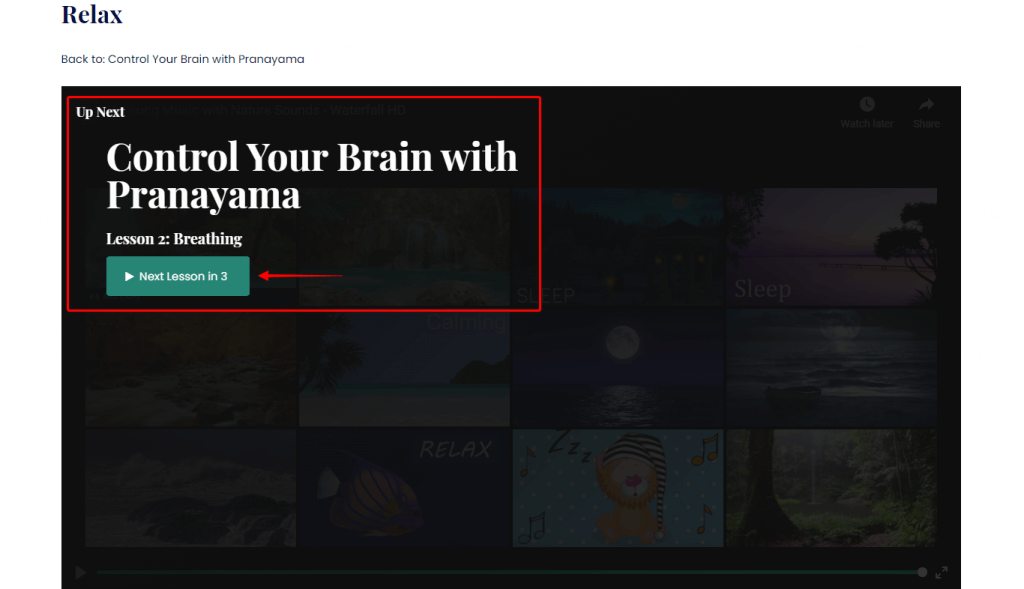
Step 9 – If you want to add a countdown timer at the end of your lesson and automatically progress learners to the next step, enable “Auto-Advance”. Here, you will see additional options to set the countdown time. Also, you can decide if the video in the next lesson should auto-play;
Step 10 – Click the “Save Changes” button to apply these settings.
Now your courses are ready. In addition, you will be able to follow students’ progress for all videos added with Presto Player.
We don't respond to the article feedback, we use it to improve our support content.